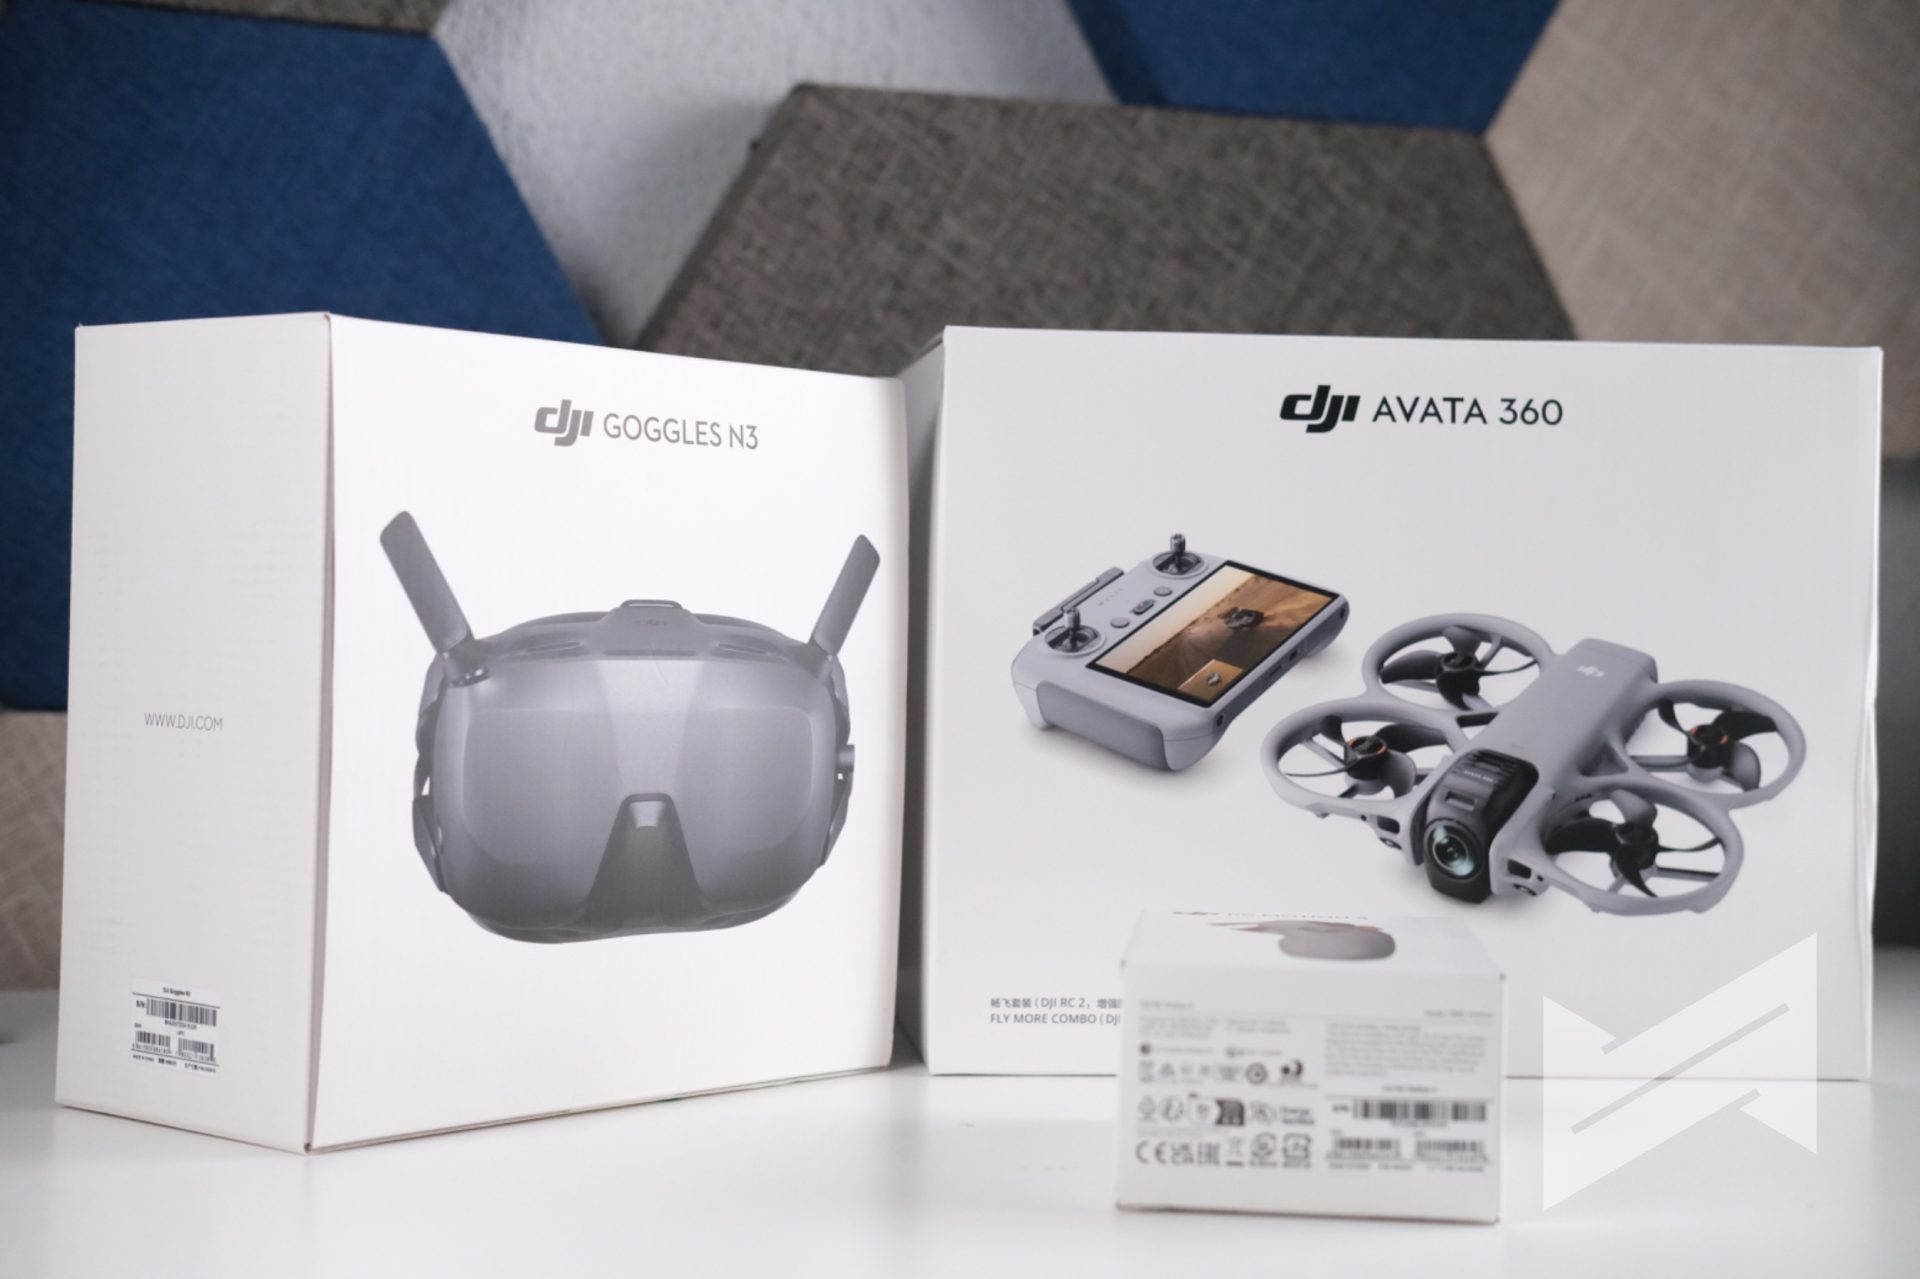
The DJI Avata 360 is here!
When DJI first announced the Avata 360, I was very curious but also a bit skeptical. I already own the DJI Avata 2 and I enjoy flying it, so I wondered what a 360° FPV drone could really add to my existing setup. After actually using the Avata 360, I realized it brings a very different way of shooting and editing that my Avata 2 simply cannot offer.
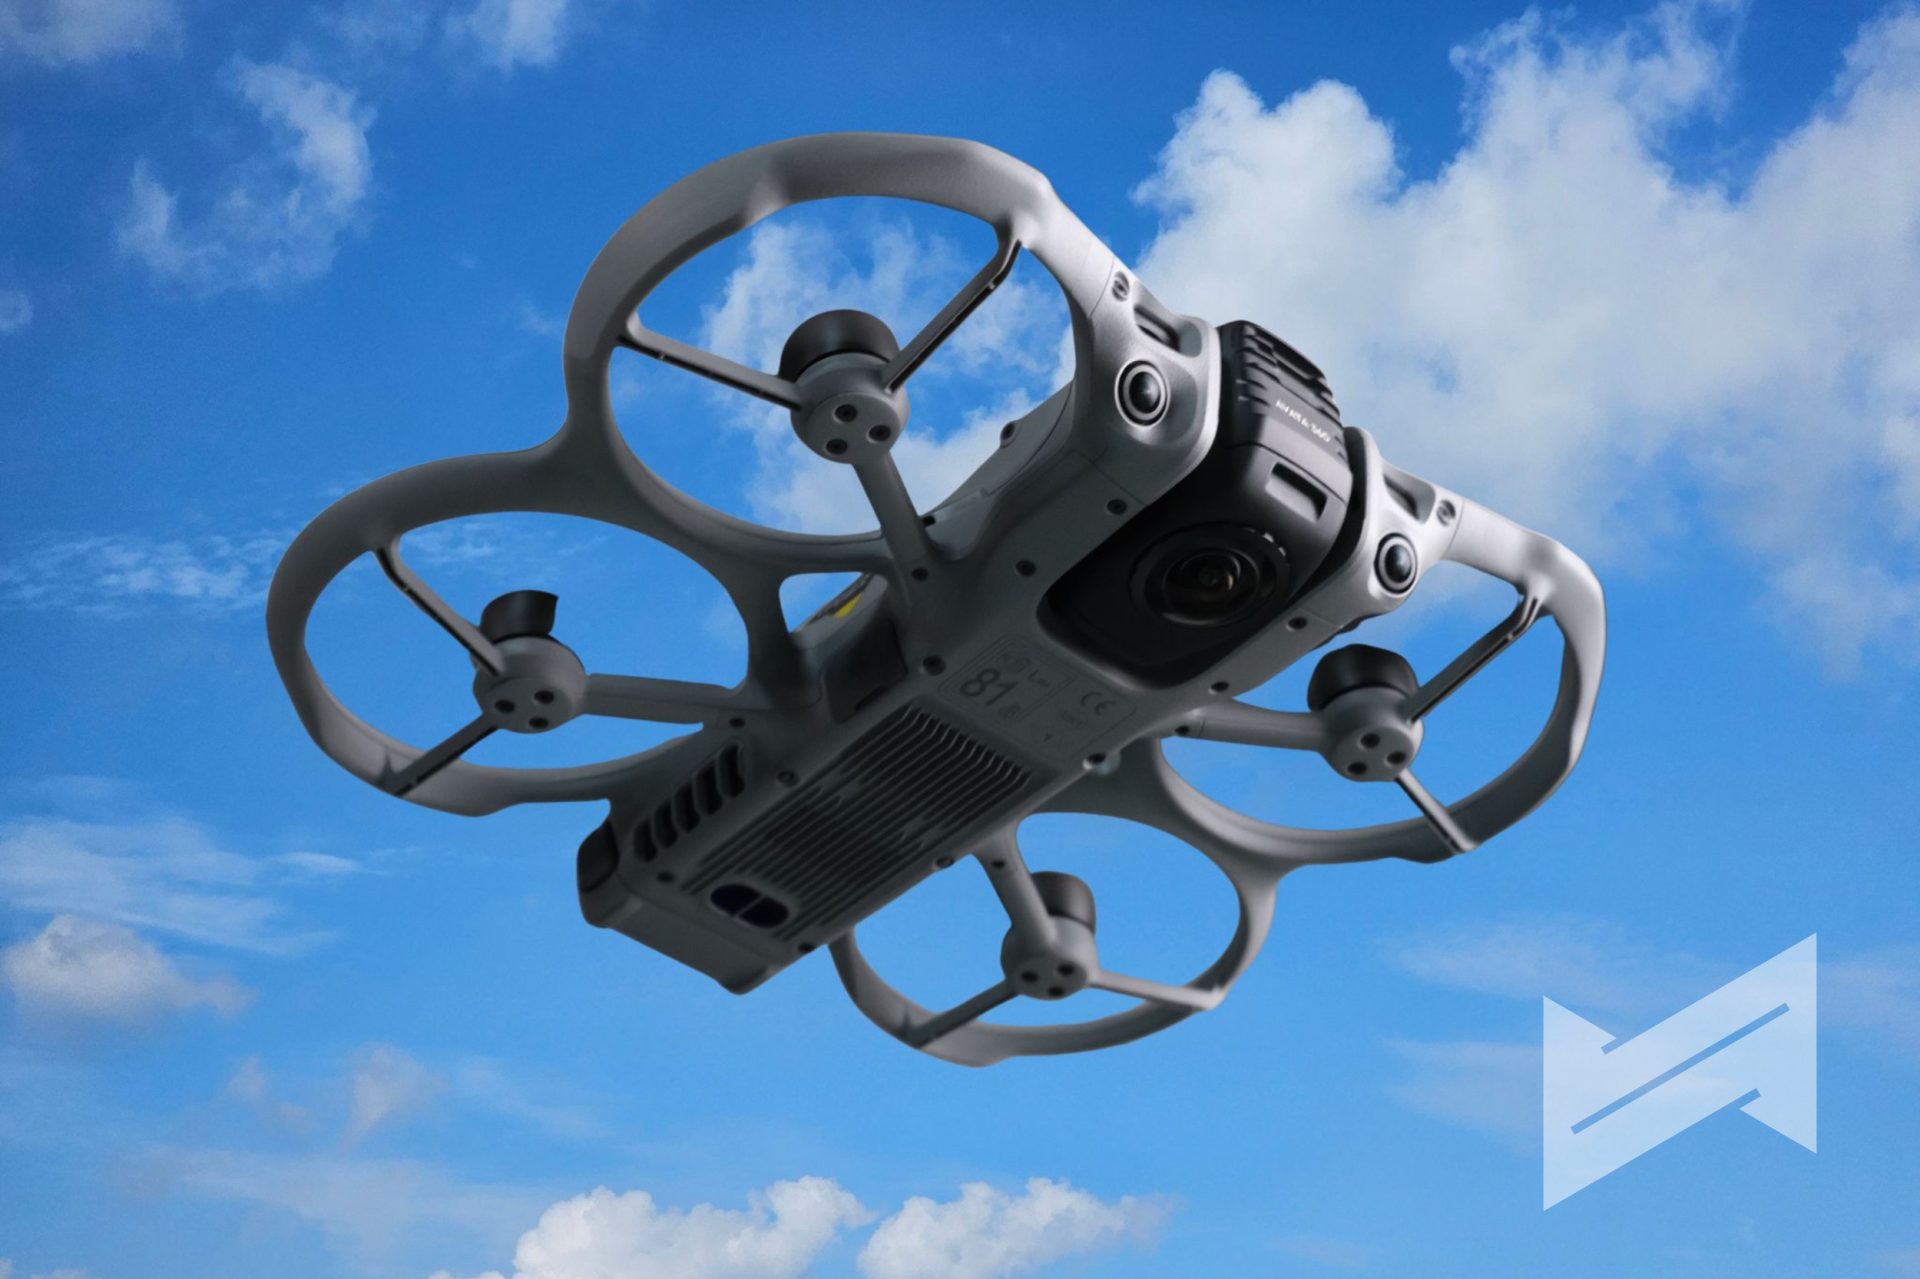
I am not a professional drone pilot, and I am approaching this product from the perspective of a content creator who enjoys flying but is still learning. From that standpoint, the DJI Avata 360 feels like a bigger, more serious FPV machine that complements the Avata 2 instead of replacing it. It looks and feels like a tool that was built to sit beside the Avata 2 in a lineup, especially considering some of its unique features and initial limitations in compatibility.
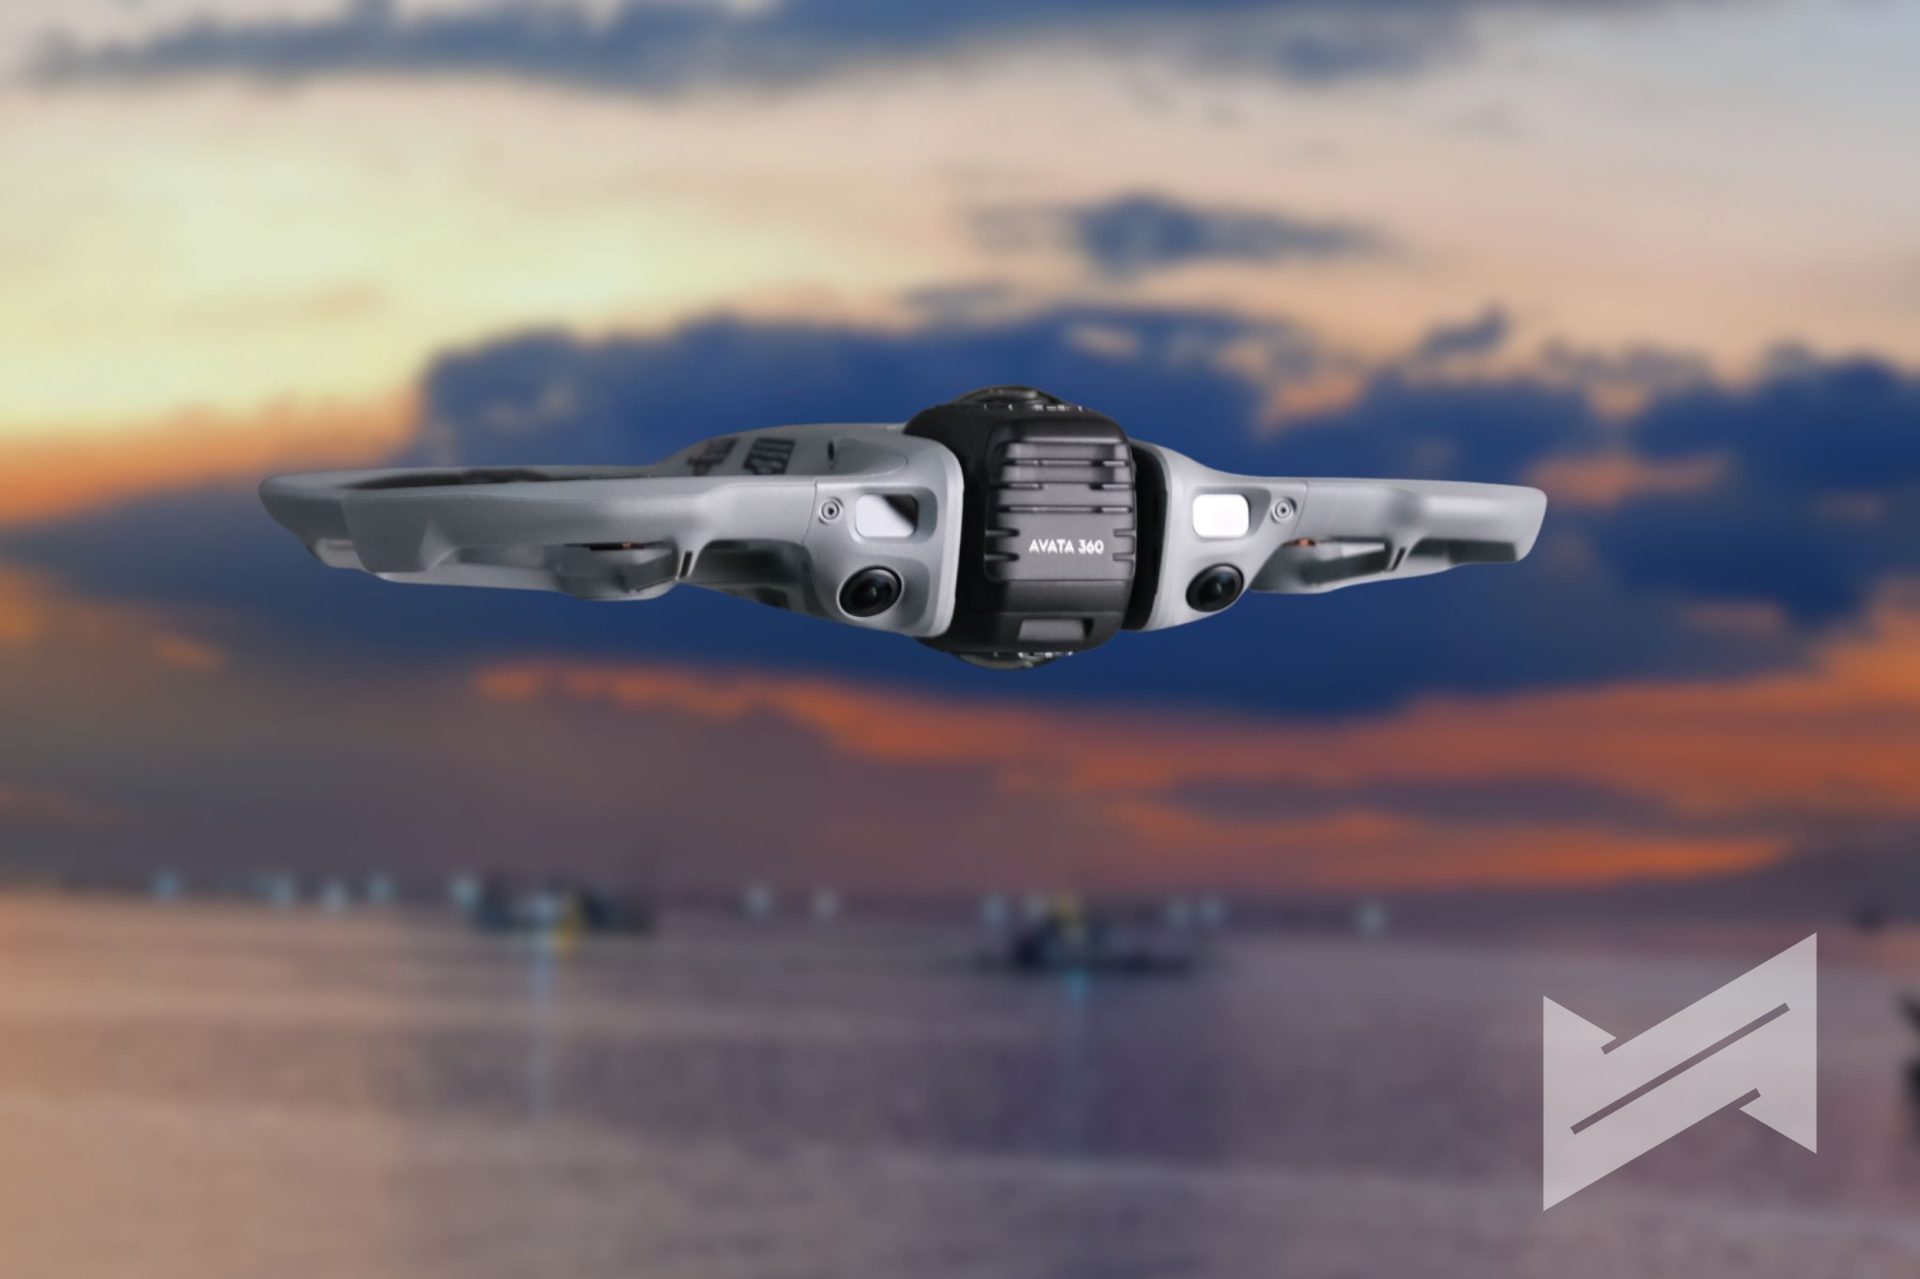
360° video, including 360° drone footage, is still considered a niche. That said, this type of content is clearly growing because it gives creators a lot of flexibility in both workflow and final output. The Avata 360 is DJI’s most ambitious attempt so far to fully embrace that style of shooting.
DJI Avata 360 Specs
Here are the main specifications that matter for creators and FPV-curious pilots.
| Feature | Specification |
|---|---|
| Sensor | 1-inch-equivalent CMOS, f/1.9 |
| 360° Video | Up to 8K/60fps HDR, with D-Log M |
| Single Lens Video | Up to 4K/60fps HDR |
| Photos | 120 MP true spherical panoramic photos |
| Pixel Size | 2.4 μm |
| Video Transmission | DJI O4+ up to 20 km (FCC) |
| Live View | 1080p/60fps |
| Flight Time | Up to 23 minutes |
| Internal Storage | 42 GB |
| Transfer | Wi‑Fi 6, up to 100 MB/s, around 1 GB in 10 seconds |
| Obstacle Avoidance | Omnidirectional in 360° mode, with forward LiDAR |
| Controllers | DJI RC 2, RC-N2, RC-N3, RC Motion 3 |
| Goggles | DJI Goggles 3, Goggles N3 |
This spec sheet tells you right away that the Avata 360 is not just a fun FPV toy. It is a flagship 8K 360° platform with serious imaging and transmission hardware.
The Rationale Behind a 360° FPV Drone
The obvious question is why anyone would want 360° capture on an FPV drone. The simple answer is creative freedom after the flight. With a normal drone, whatever you frame in flight is what you bring into the edit. If you miss a move or angle, you need another flight. This is a waste of battery or missed crucial point in time (and place).
With the DJI Avata 360, you are recording everything around the drone in all directions in one go. In post, you decide where to look and how to move the virtual camera. One flight can become a standard forward-view cinematic shot, a tiny-planet sequence, a tunnel-style effect, or a more experimental perspective that would be impossible to plan perfectly in real time.
DJI describes the Avata 360 as a “creative director in the sky” and that description actually makes sense once you start reframing footage. It is not targeting the role of a long-range photography workhorse. It is designed for creators who want to squeeze as many creative variations as possible out of a single flight and a single location.
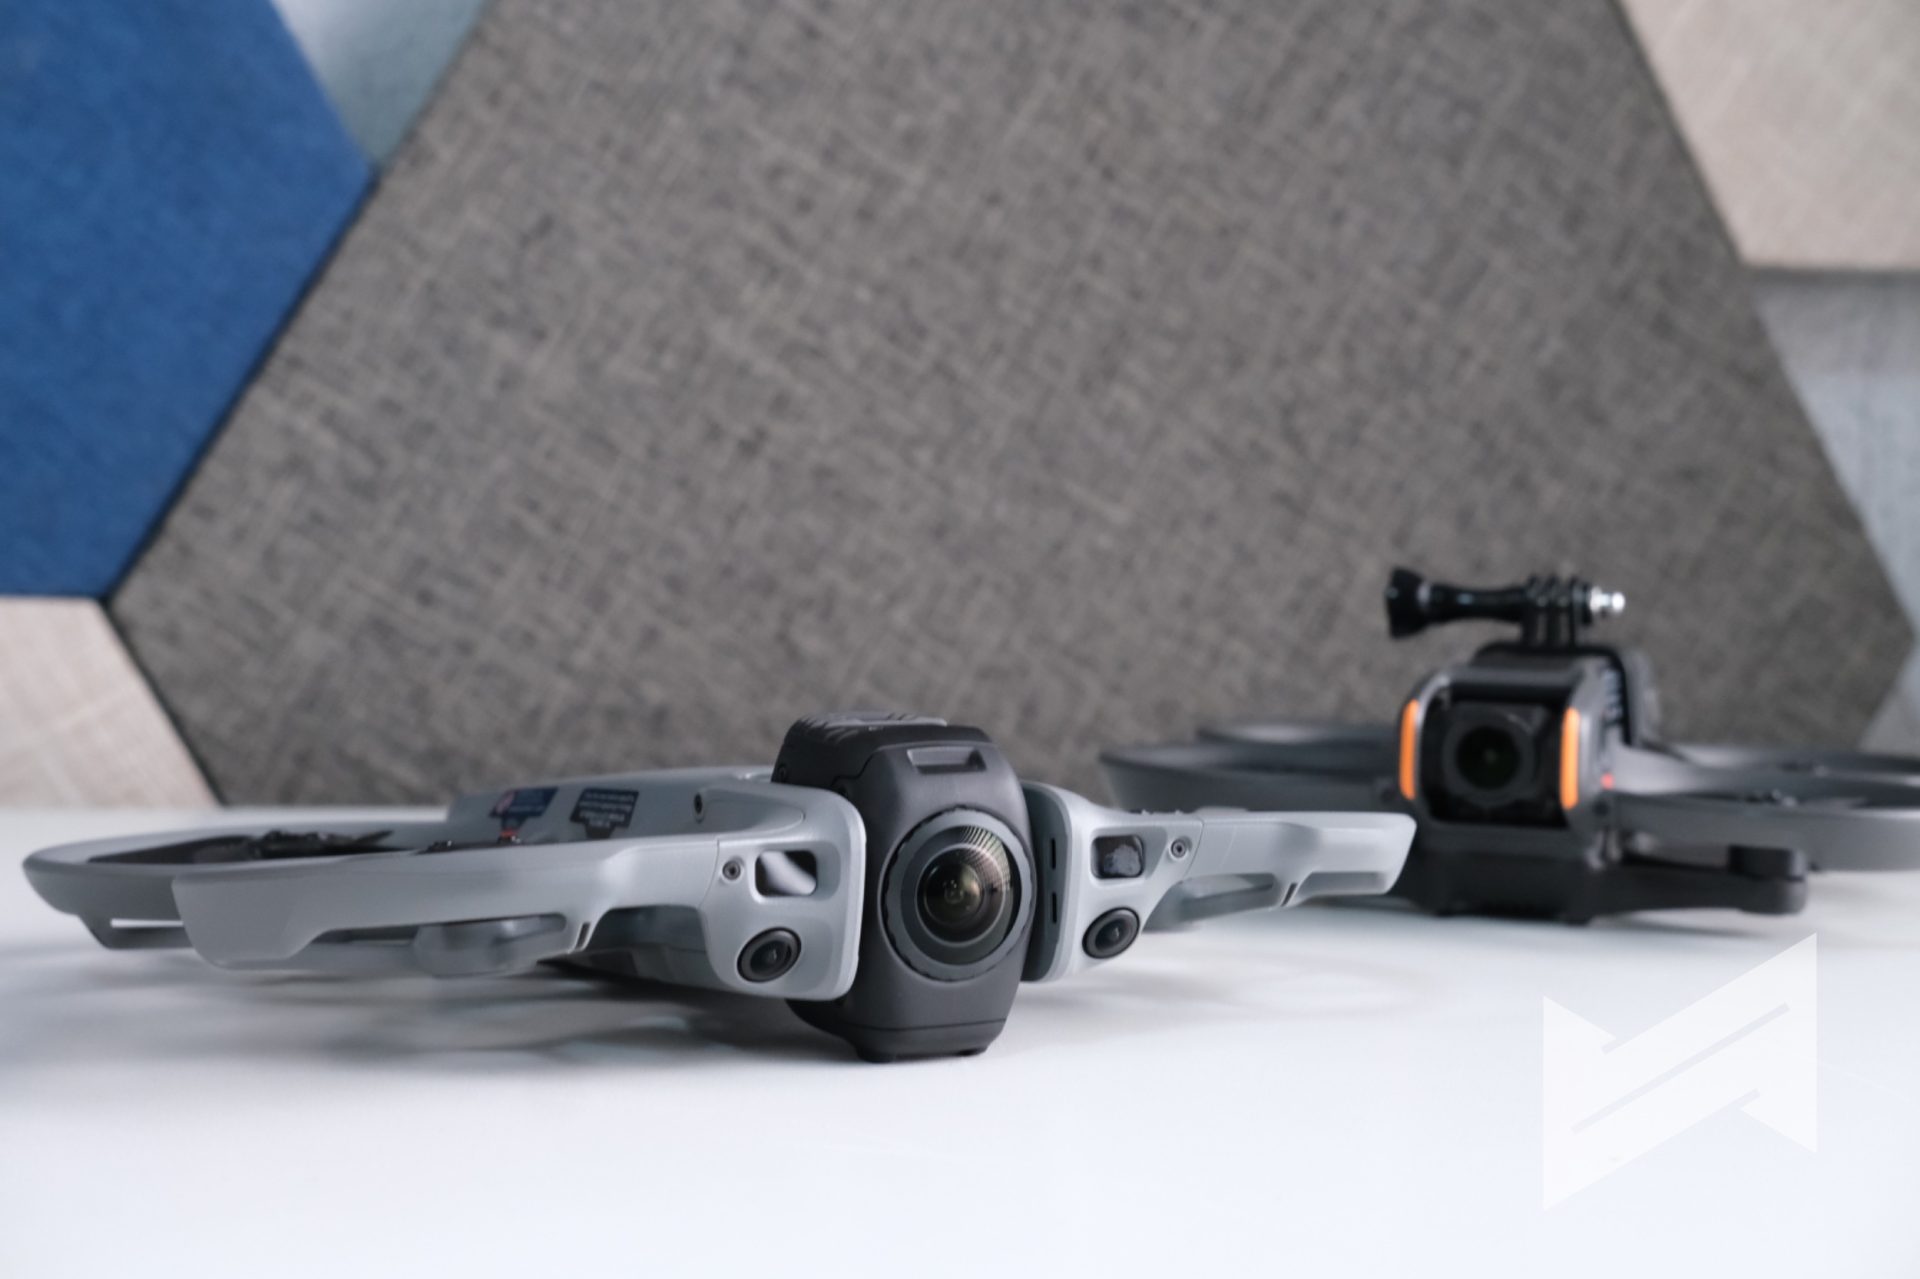
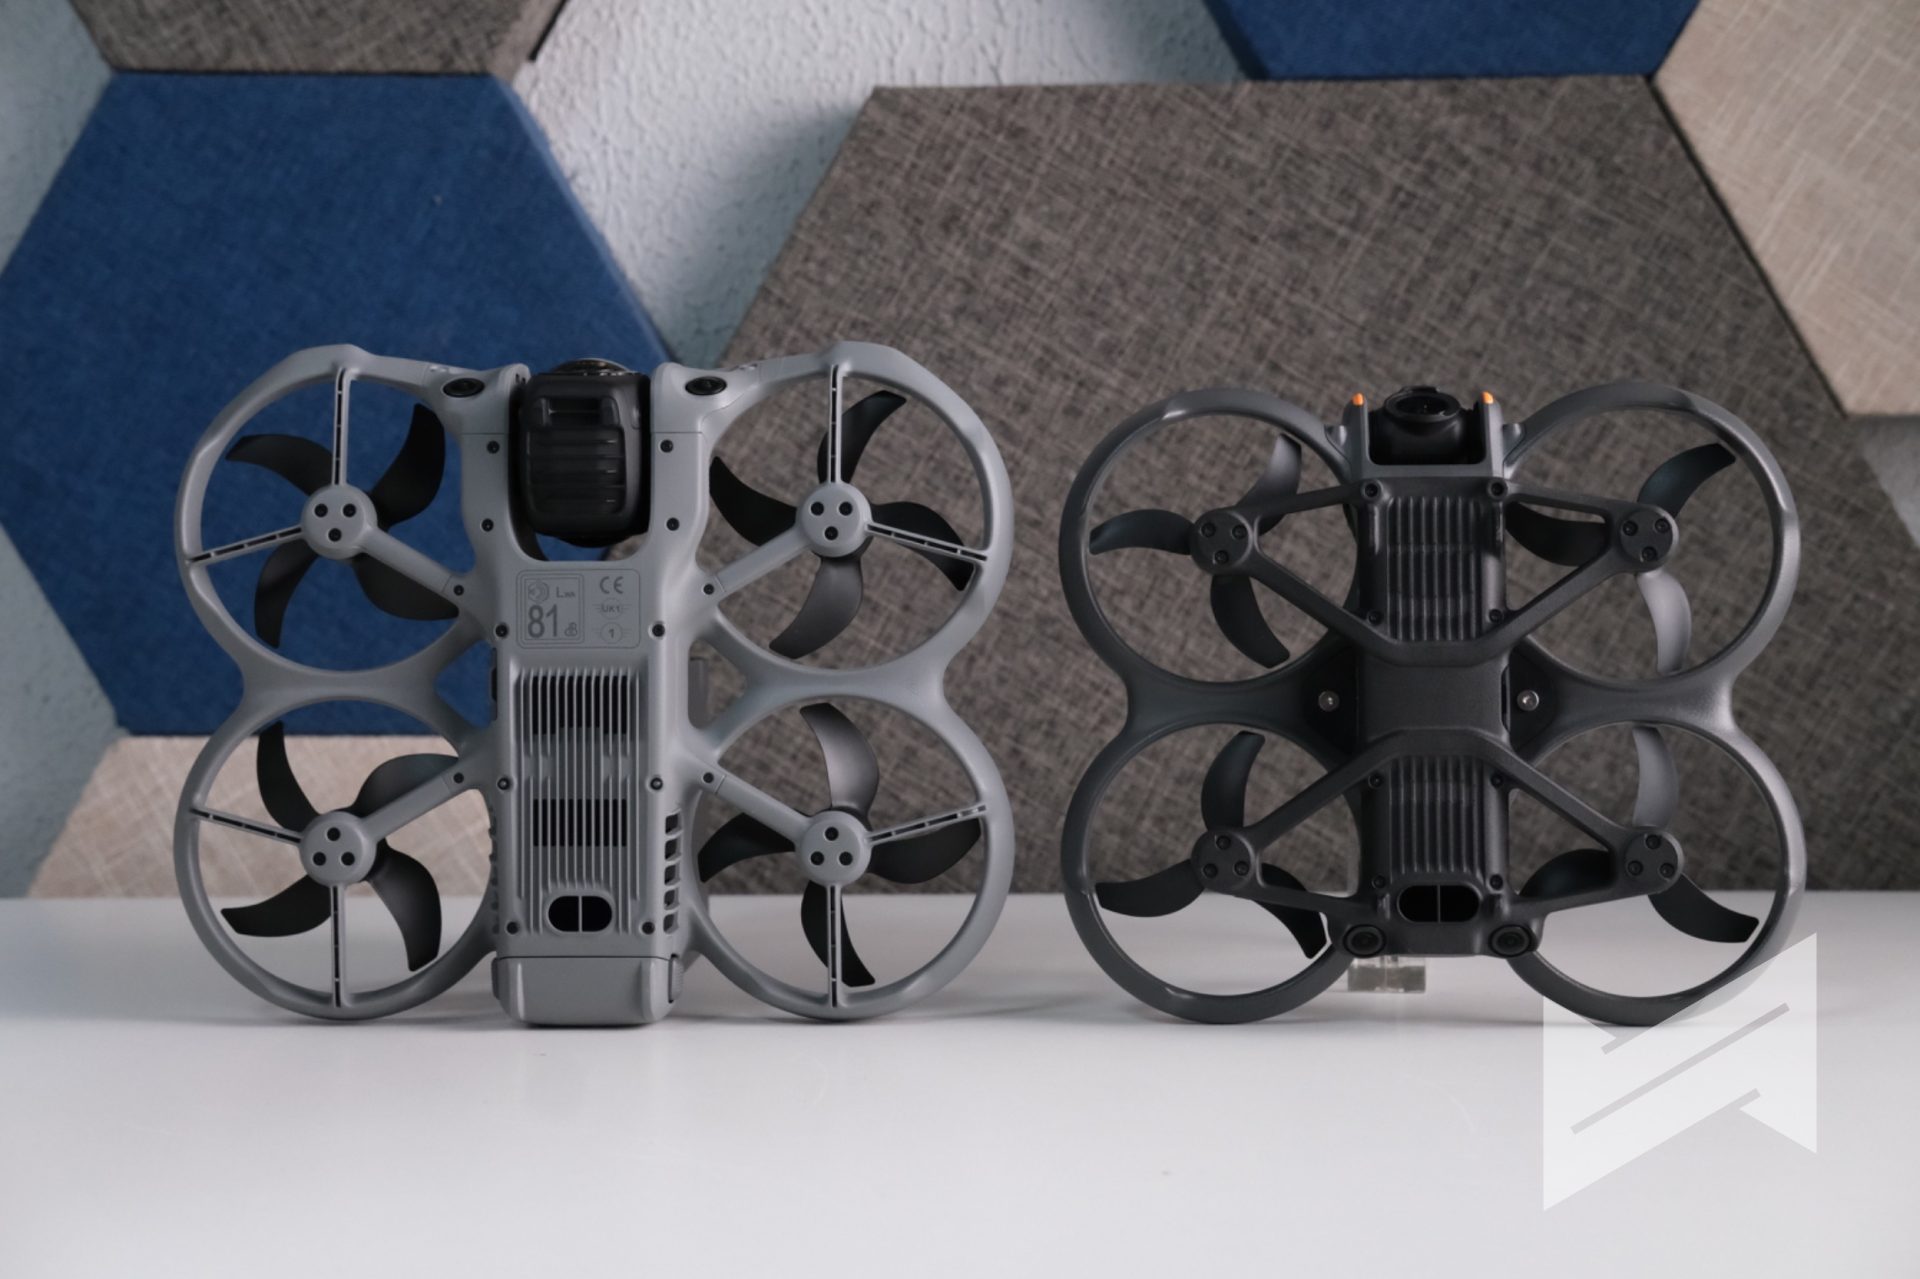
What Sets It Apart and Makes It Better vs the Antigravity Drone
The Antigravity A1 is the most obvious comparison in the panoramic FPV space. On paper, both drones target similar users, but in practice the DJI Avata 360 pulls ahead in several crucial areas.
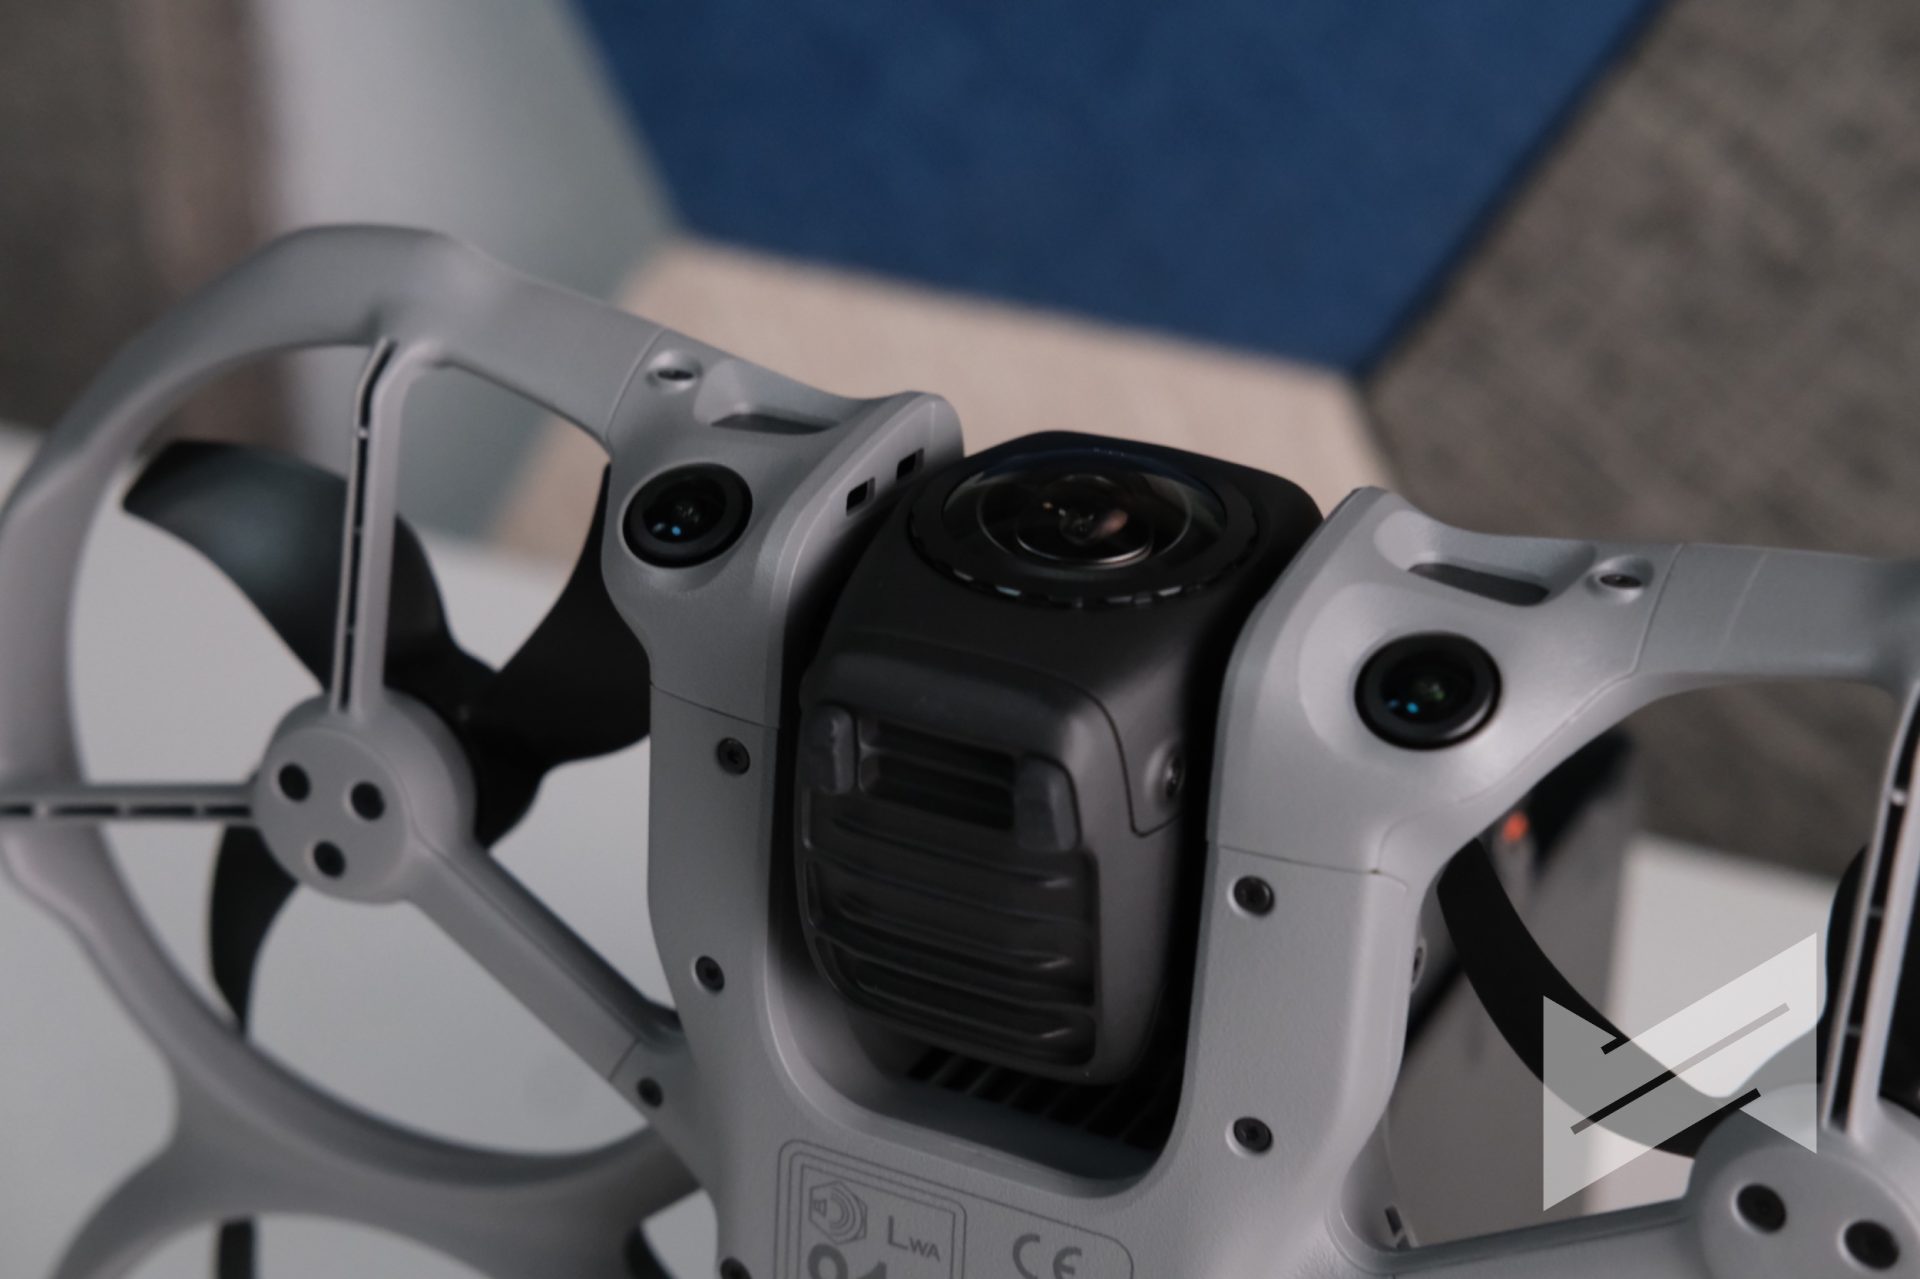
The Avata 360 uses a 1‑inch CMOS sensor that delivers 8K/60fps HDR video with D-Log M. The Antigravity A1 relies on a smaller 1/1.28‑inch CMOS sensor and tops out at 8K/30fps without D-Log M. In scenes with complex lighting or fast action, that extra frame rate and sensor size give the DJI drone a noticeable advantage for both motion and grading latitude.
On video transmission, the DJI O4+ system on the Avata 360 supports up to 20 km in FCC conditions, while the Antigravity A1 reaches only around 10 km. More importantly, the Avata 360 is clearly ahead in safety. It has an integrated propeller guard, omnidirectional obstacle sensing in 360° mode, and forward LiDAR that works even in very low light. The Antigravity A1 does not have propeller guards and does not offer omnidirectional obstacle avoidance.
Control flexibility is another key difference. The Avata 360 can be flown with the DJI RC 2 for precise control and access to features like Spotlight and advanced tracking, or with the RC Motion 3 plus goggles for immersive FPV. The Antigravity setup only offers a single control approach based on a joystick plus goggles. The DJI Avata 360 may look less flashy, but it gives creators a far more complete response to actual real-world needs.
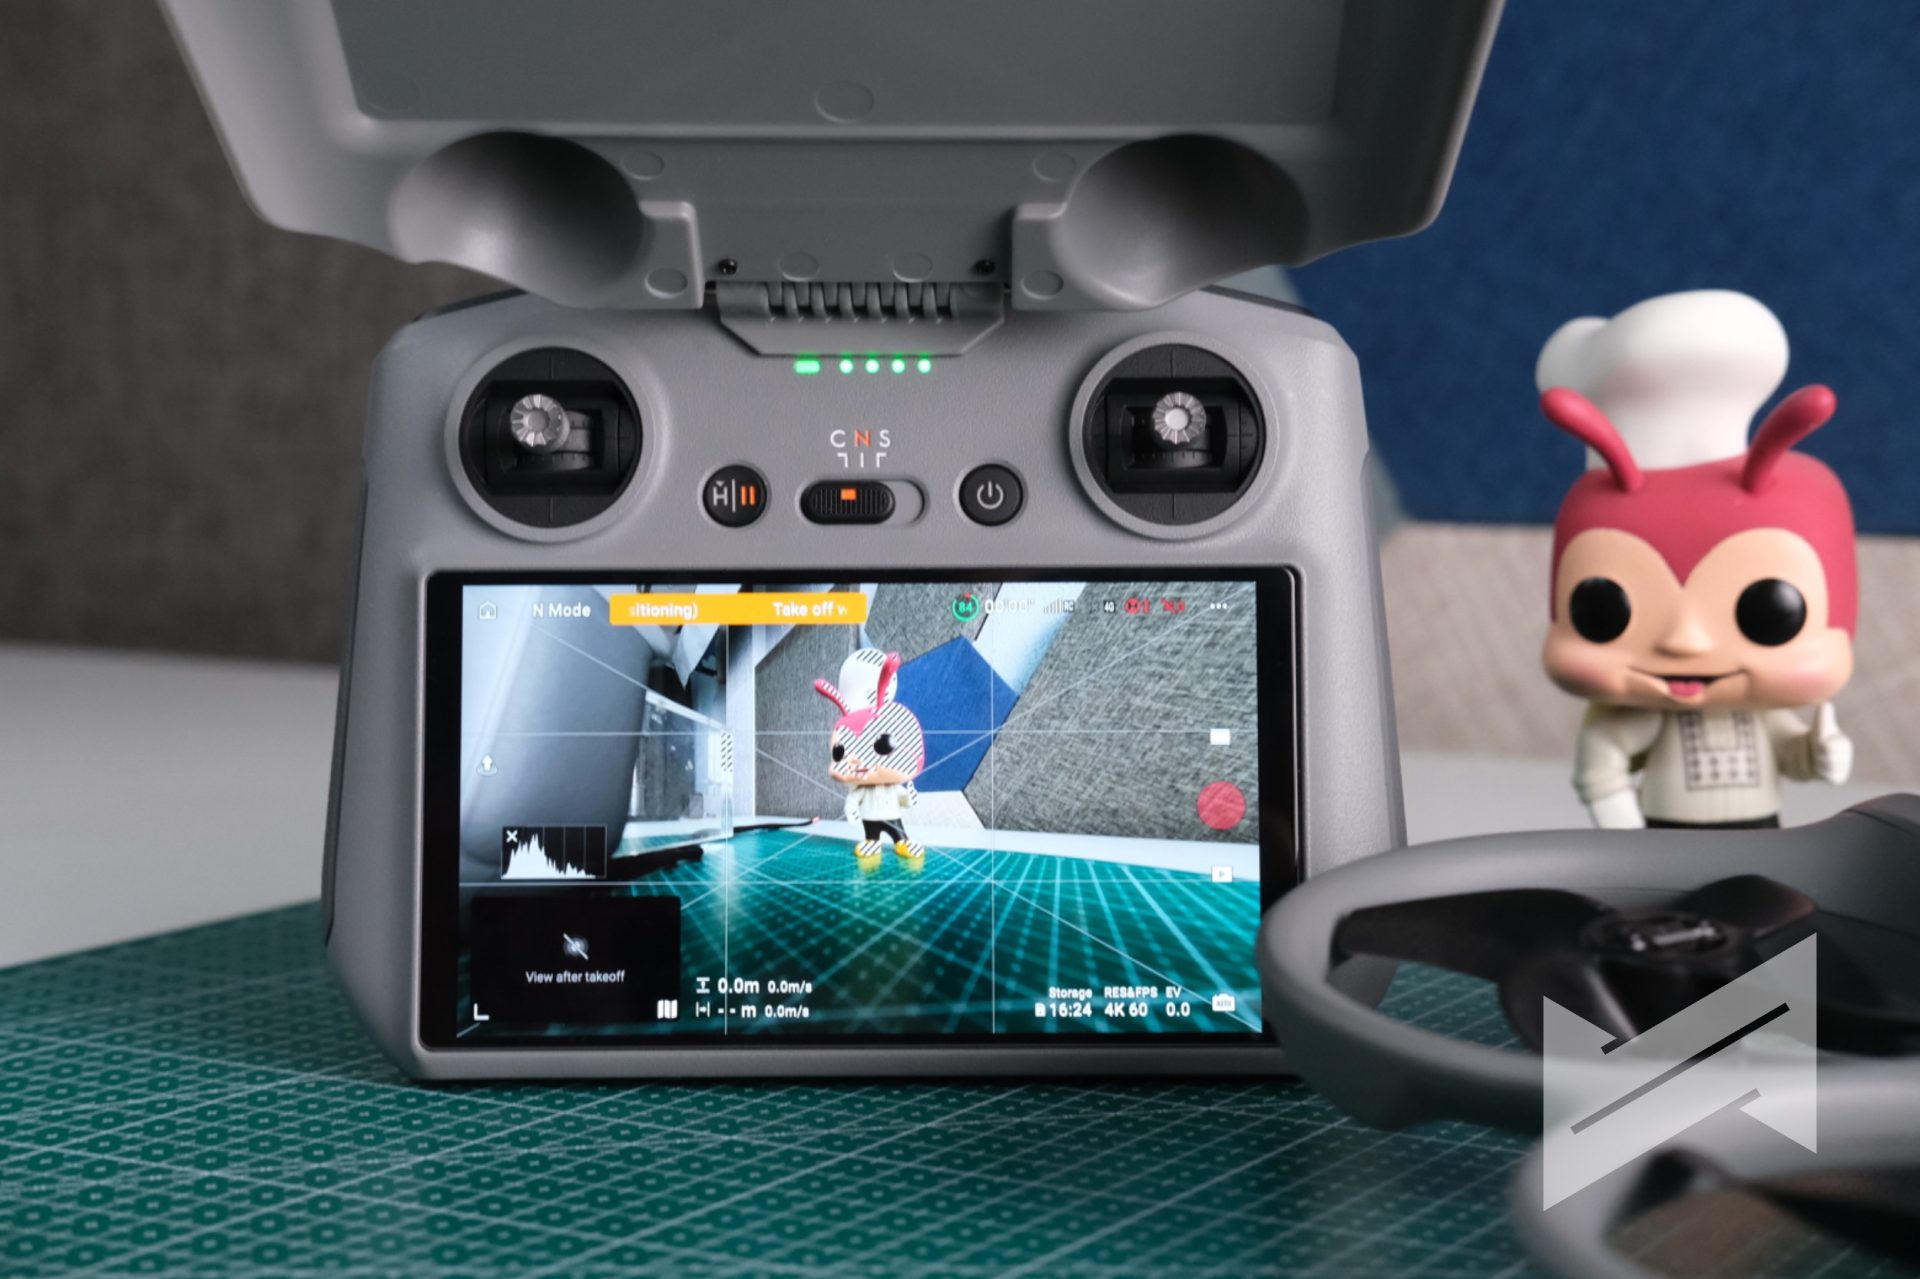
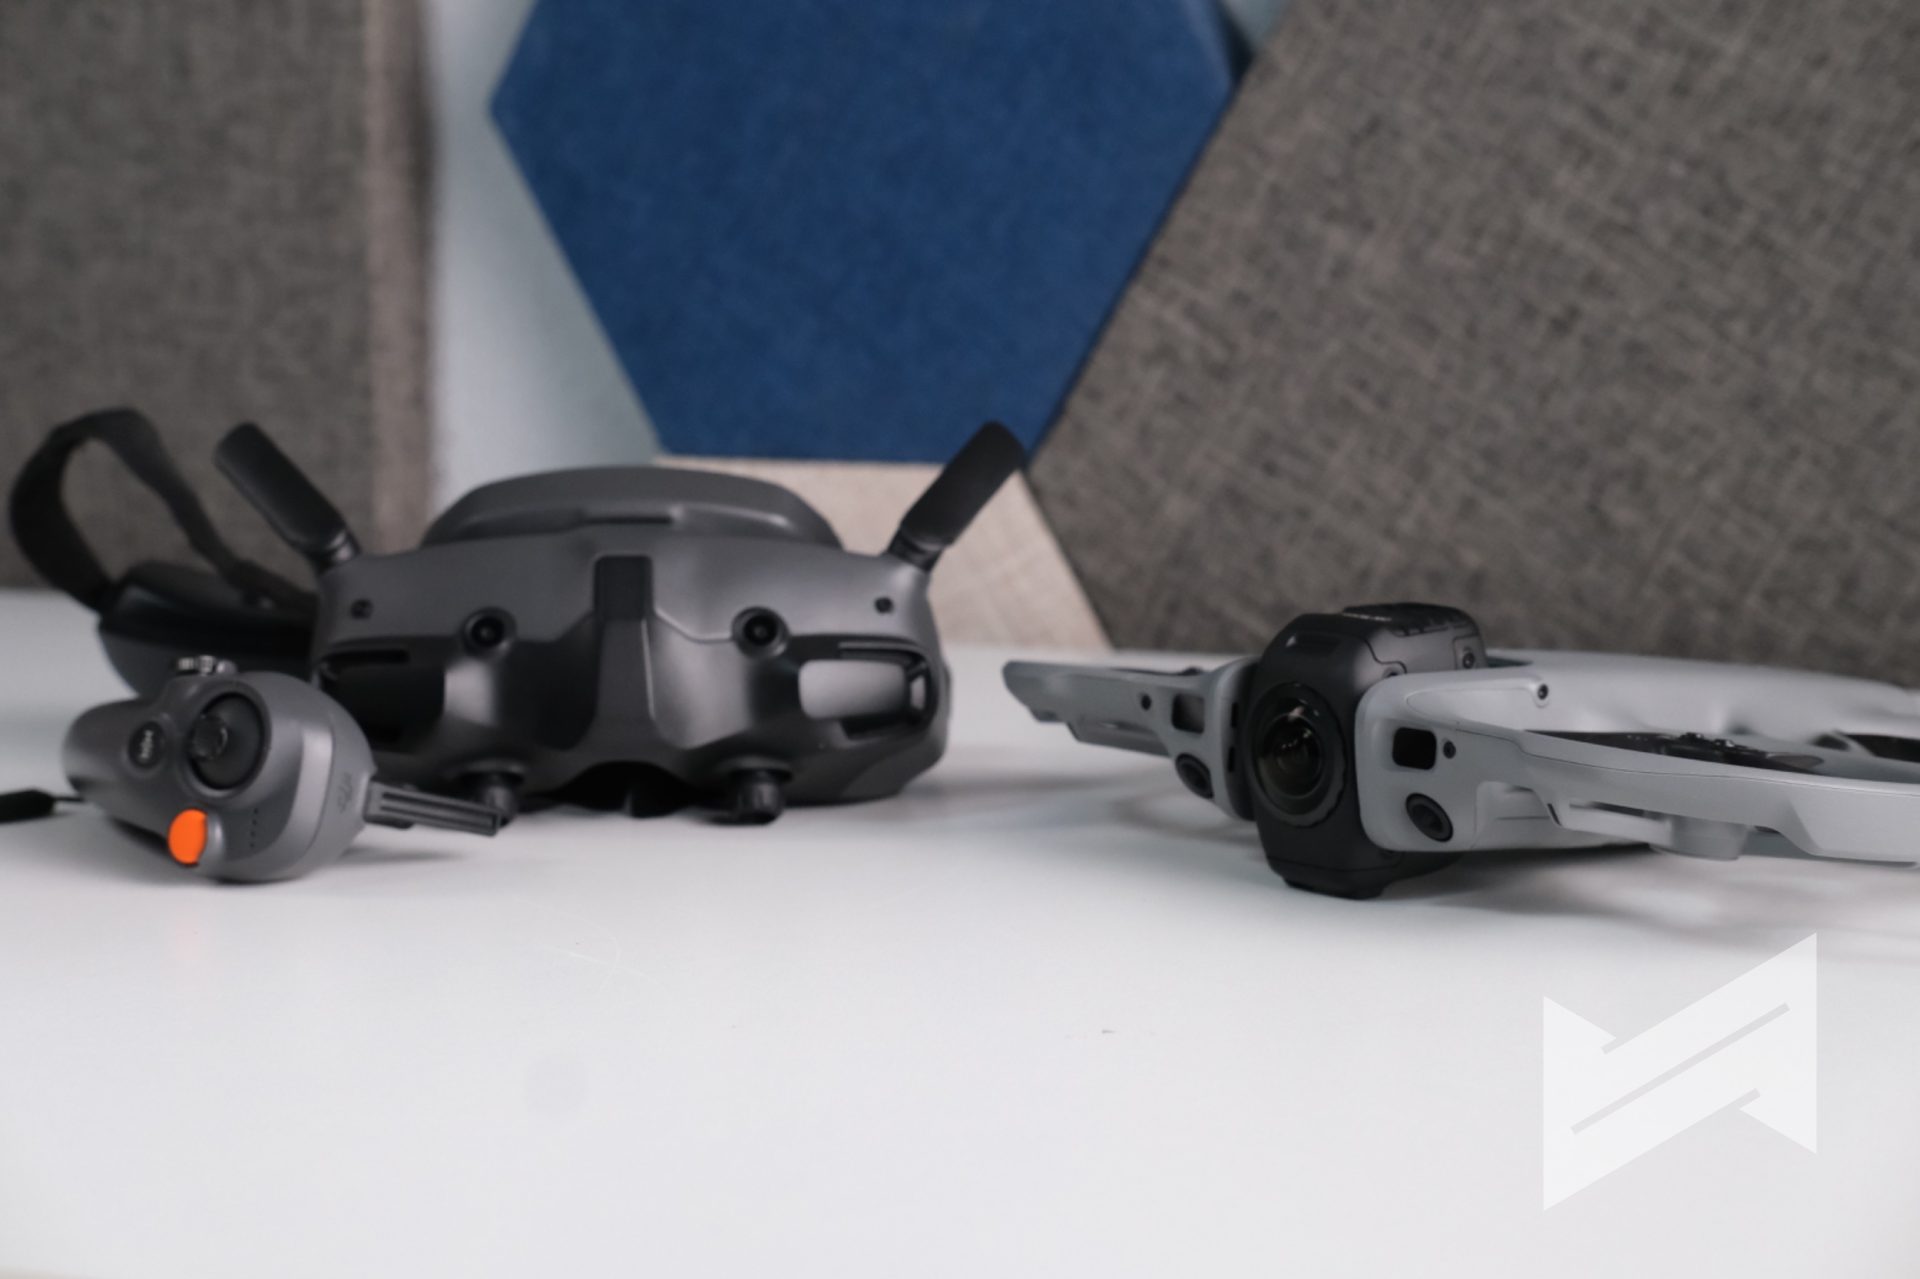
Flight Experience Using the Goggles 3 and FPV Motion Controller
My primary way of flying the DJI Avata 360 has been with my Goggles 3 and the FPV Motion Controller. This is where the drone really feels alive. Inside the goggles, you see a clear 1080p/60fps feed that makes you feel like you are riding along with the drone, and the motion controller offers an intuitive way to steer for anyone who is not comfortable with full manual sticks.
From the perspective of someone who is not a pro FPV pilot, the Avata 360 feels surprisingly friendly in the air. Its larger frame compared to the Avata 2 is noticeable, and yet the integrated propeller guards and smart safety systems help reduce anxiety, especially when you fly close to obstacles. I even handed the Goggles 3 and Motion Controller to my brother, who had flown my Avata 2 only once before. He was able to fly the Avata 360 with confidence after a short briefing, which speaks well to how DJI is lowering the learning curve.
The omnidirectional obstacle avoidance in 360° mode is a major contributor to that confidence. In low light, the system still works down to about 1 lux, and the forward LiDAR can detect obstacles and brake the drone even when the environment is almost pitch black. During return flights, it also performs upward detours when needed, instead of blindly plowing forward. For an FPV-oriented aircraft, that kind of safety net feels very advanced.
If Goggles 3 stretch your budget, the Avata 360 also works with the more affordable Goggles N3. You still get immersive FPV flying when paired with the RC Motion 3, and you can enjoy many of the same thrills and perspectives. The Goggles N3 combo does not include every advanced function of the RC 2 combo, but it is a great entry path for creators who want to experience FPV and 360° without going straight to the highest-priced bundle.
Reframing Experience Using the DJI Fly App on iPhone
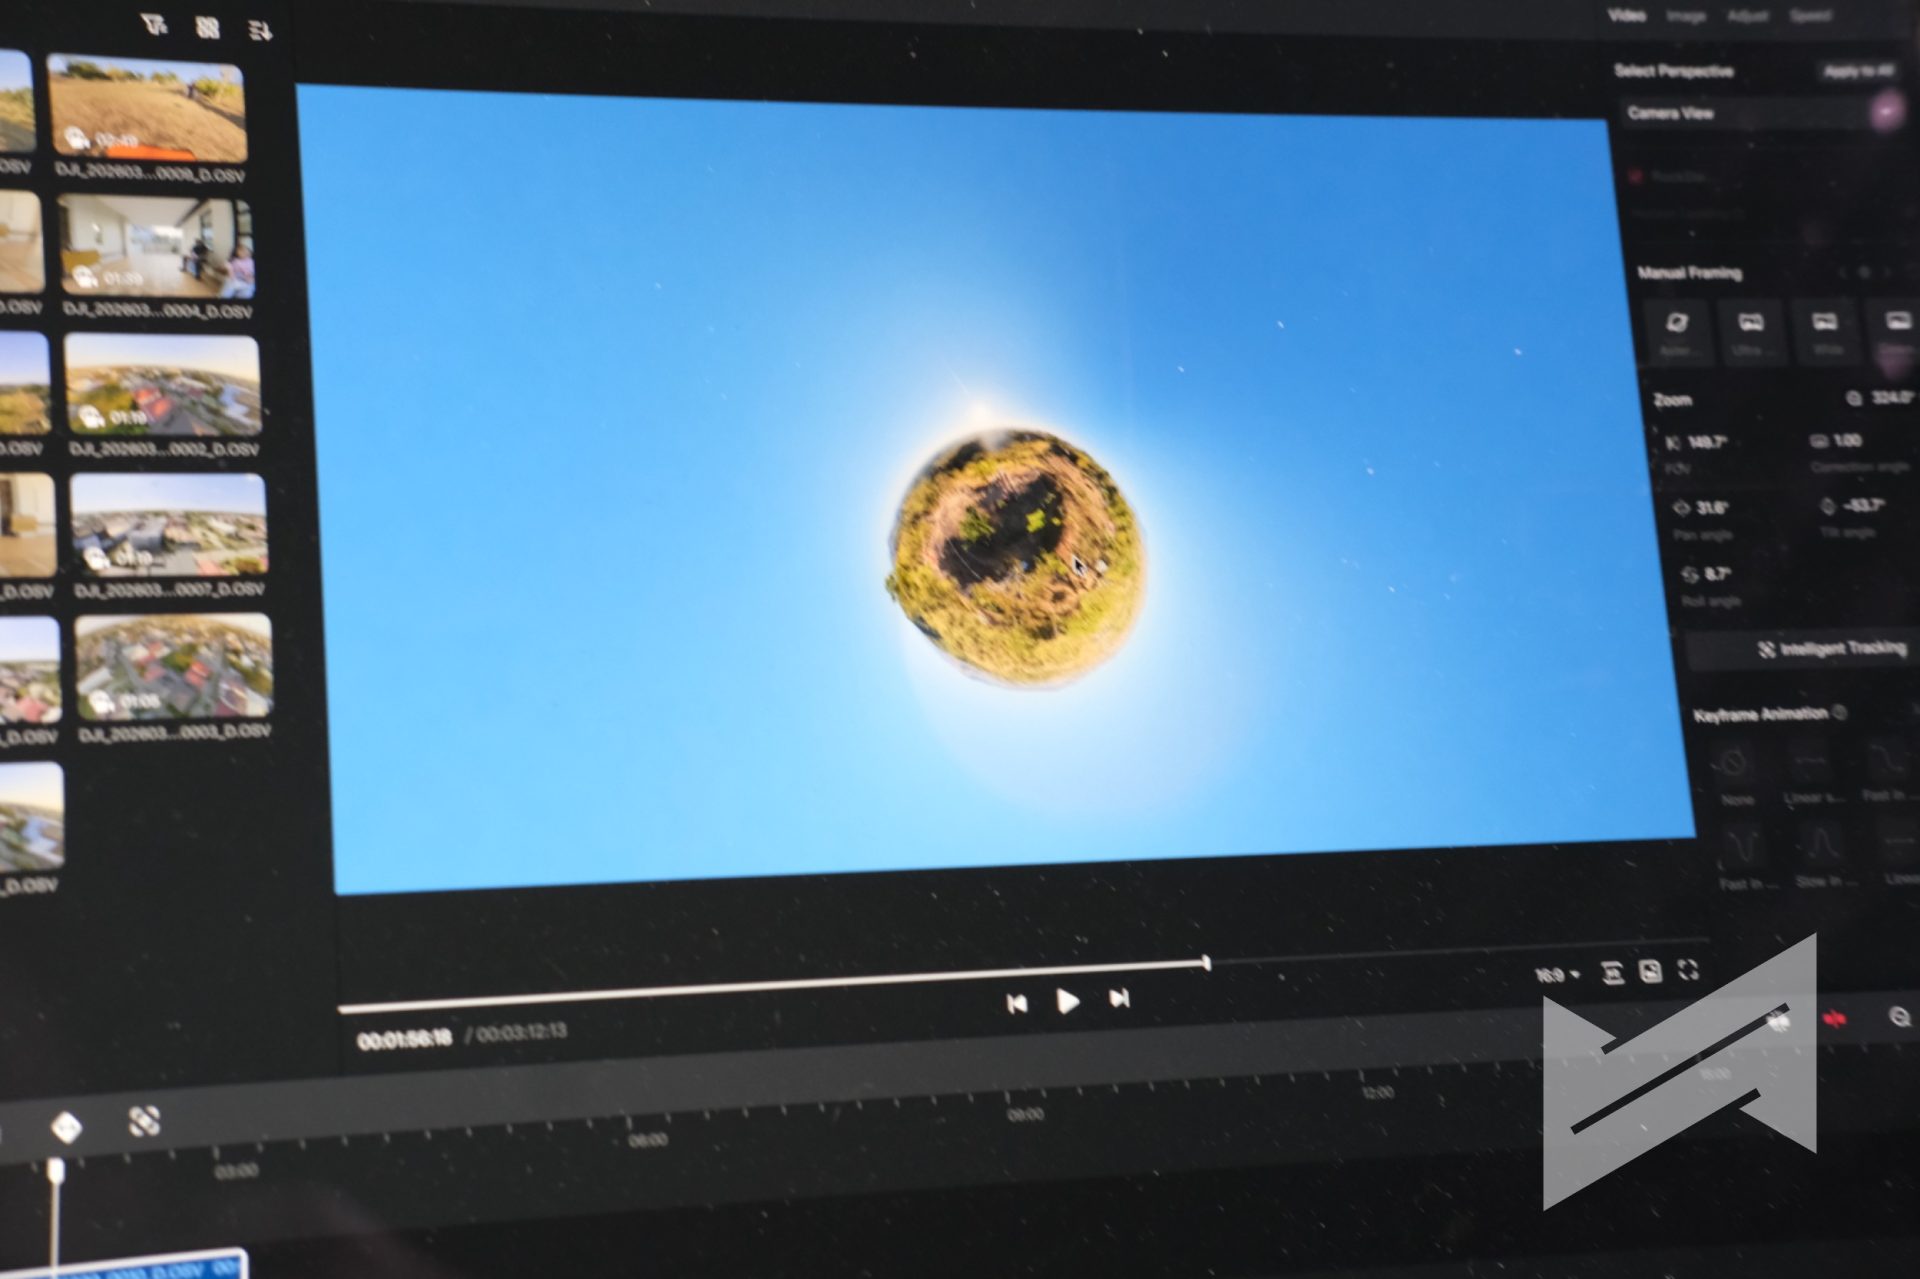
Once you finish flying, the next part of the Avata 360 experience is reframing. With Wi‑Fi 6 High-Speed Transfer, moving media from the drone to your iPhone is fast. DJI claims around 1 GB in about 10 seconds at up to 100 MB/s, and in practice the transfer feels quick enough to keep you in the creative flow.

The DJI Fly app acts as your first reframing station. Using GyroFrame, you can adjust the virtual camera angle, change the roll and tilt, tweak the field of view, and add motion within the 360° clip. All of this can happen directly on your phone. For social media, this is extremely useful because you can create different edits for Reels, TikTok, or Shorts without going near a desktop editor.

There is one practical tip I highly recommend if you are new to reframing. Fly in clean, straight or clearly defined paths whenever possible. Because you are going to choose your framing later, the simpler the flight path, the easier it is to craft multiple polished angles out of one clip. You can do several linear segments in one flight and then cut those segments in the edit. You can also record separate clips per idea if you prefer more structure. Once you get used to it, it really feels like the entire world is your playground and the footage is clay you can reshape.
Reframing Experience Using the DJI Studio App on Mac
For deeper editing and more advanced reframing, DJI Studio on Mac (or even PC) is where the Avata 360 really shows its potential as a serious post-production tool. The panoramic virtual gimbal concept is key here. Because you have a full 360° capture, you can simulate virtual pitch and roll movements without being limited by a mechanical gimbal.
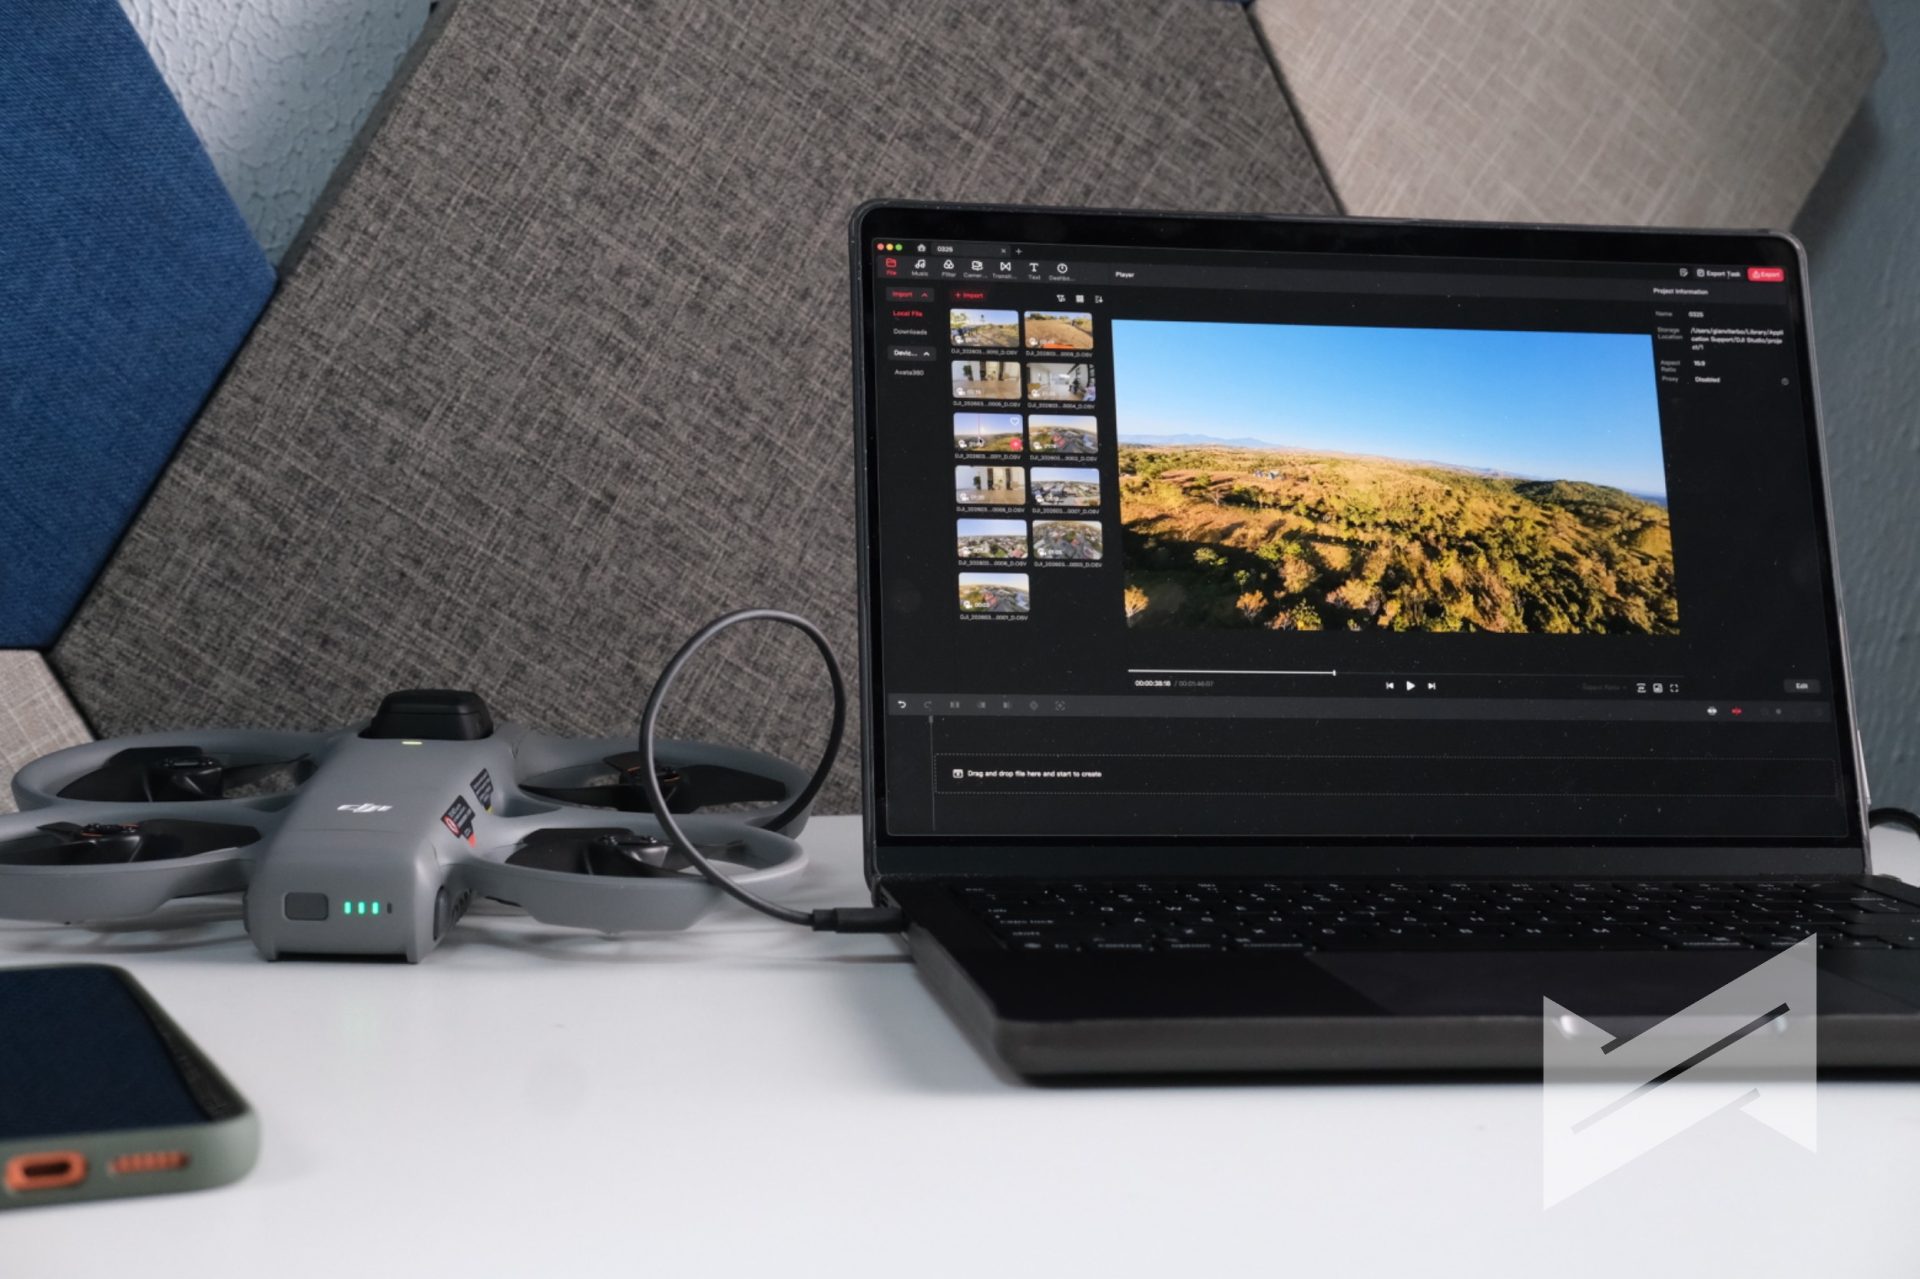
From a single forward flight, you can output several completely different videos. One could be a traditional forward-facing cinematic shot, another a tiny planet clip, and another a tunnel-style sequence that bends perspective in a very dramatic way. You can also leverage intelligent tracking inside your 360° footage. DJI Studio can lock onto people, vehicles, or other subjects and generate smooth tracking from the panoramic source, even if you did not manually track them while flying.
Spotlight Free is one of the stand-out features in this ecosystem. It delivers a level of automated camera language that previously belonged to DJI’s higher-end platforms like Inspire 3, but now attached to a 360° FPV drone that you can carry in a bag. Combined with ActiveTrack 360° and the infinite roll options from the virtual gimbal, DJI Studio turns Avata 360 footage into a very flexible base for creative edits.
An Interesting Approach to “Vertical” Content
The Avata 360 does not shoot native vertical video in the usual sense, but its 360° capture gives you a smart workaround. You can frame vertical compositions during the reframing stage and still maintain strong image quality.
Because the drone records in 8K 360° and retains usable 1080p resolution even when cropped to around a 100° field of view, you have enough room to punch in for vertical outputs without the footage falling apart. For creators who focus on vertical-first platforms, this is a very practical advantage. It feels like you are zooming in and out inside a sphere of footage until you find the perfect frame for TikTok or Reels.
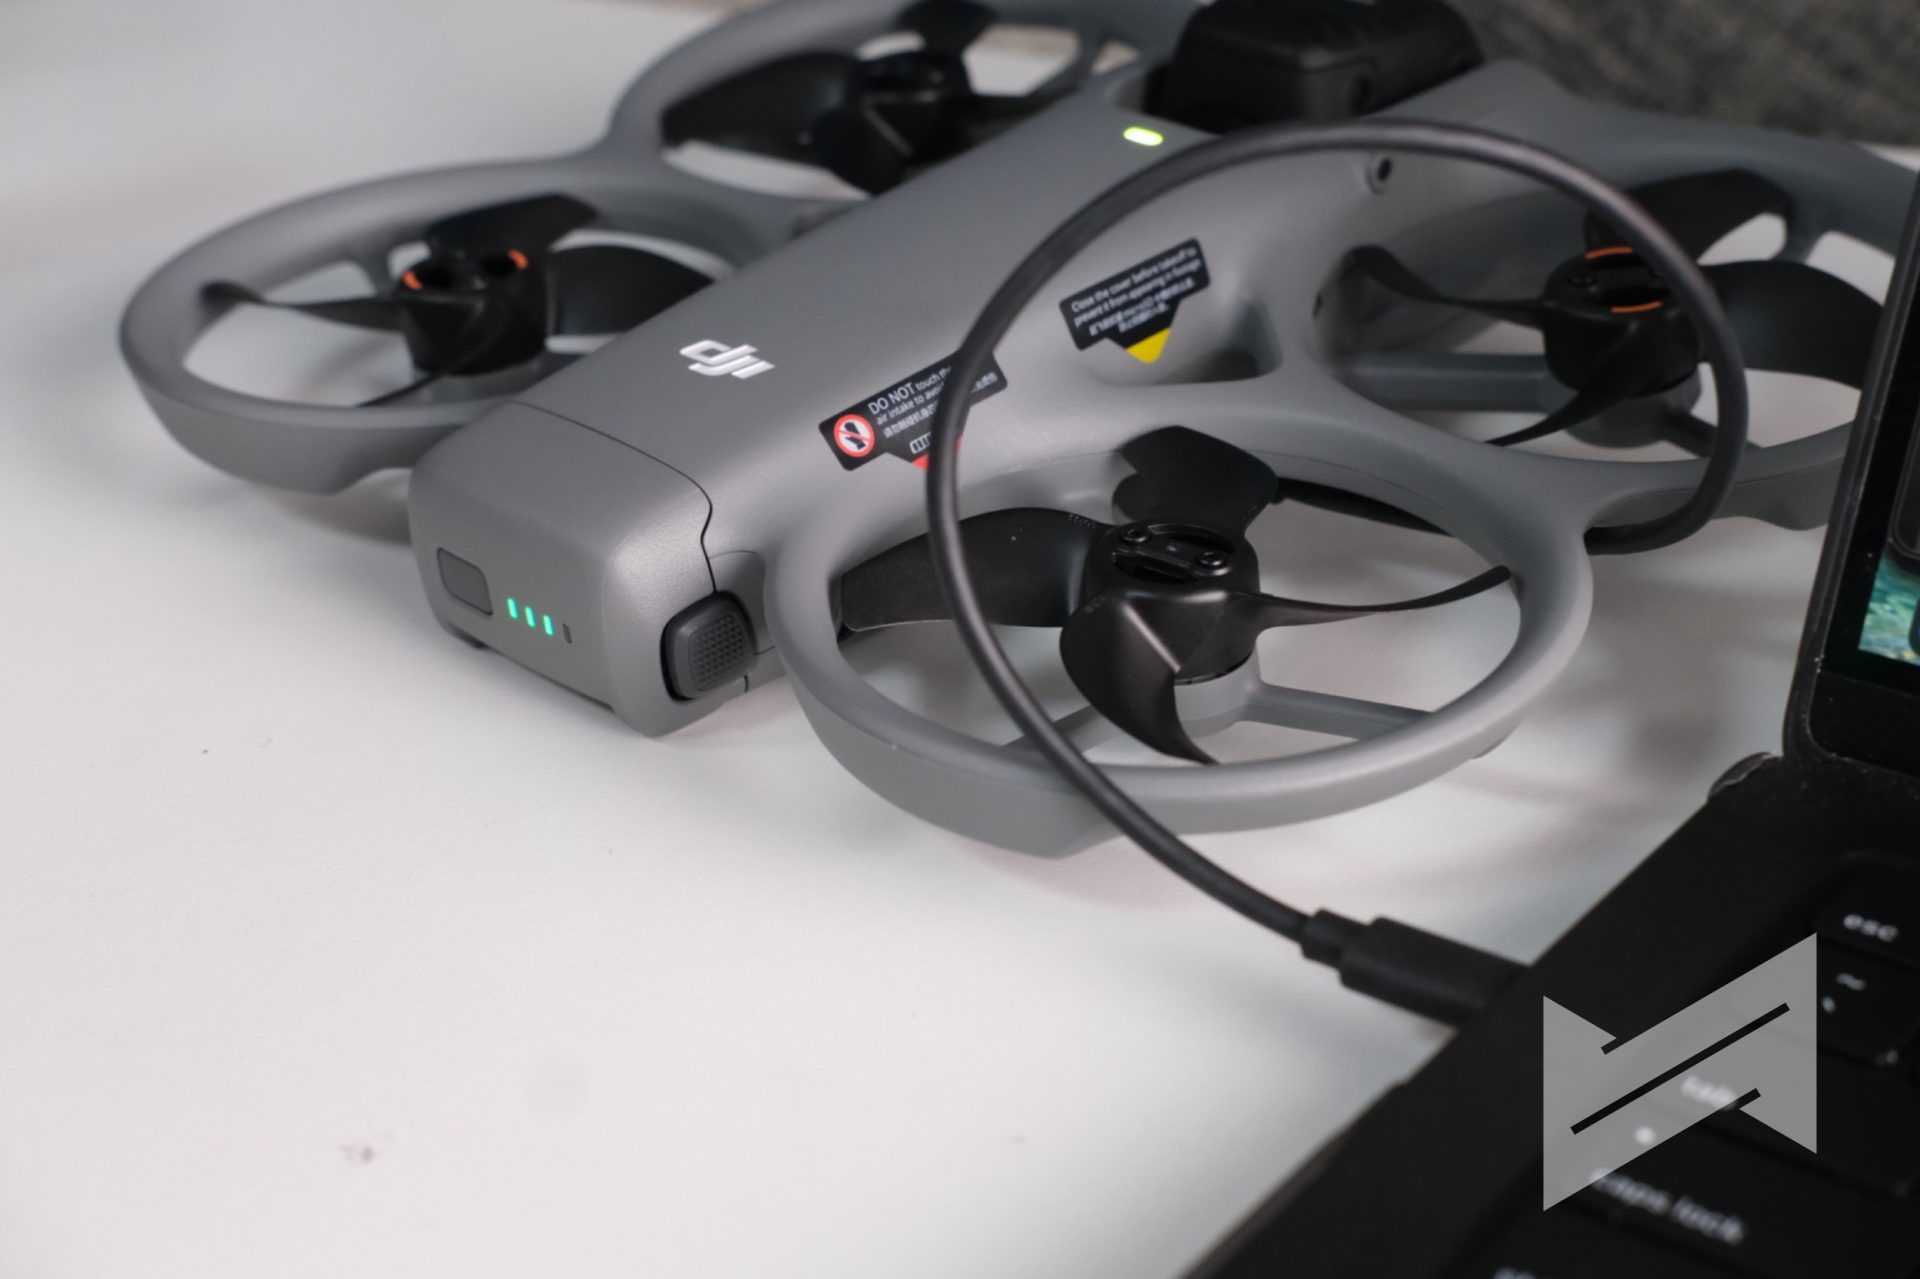
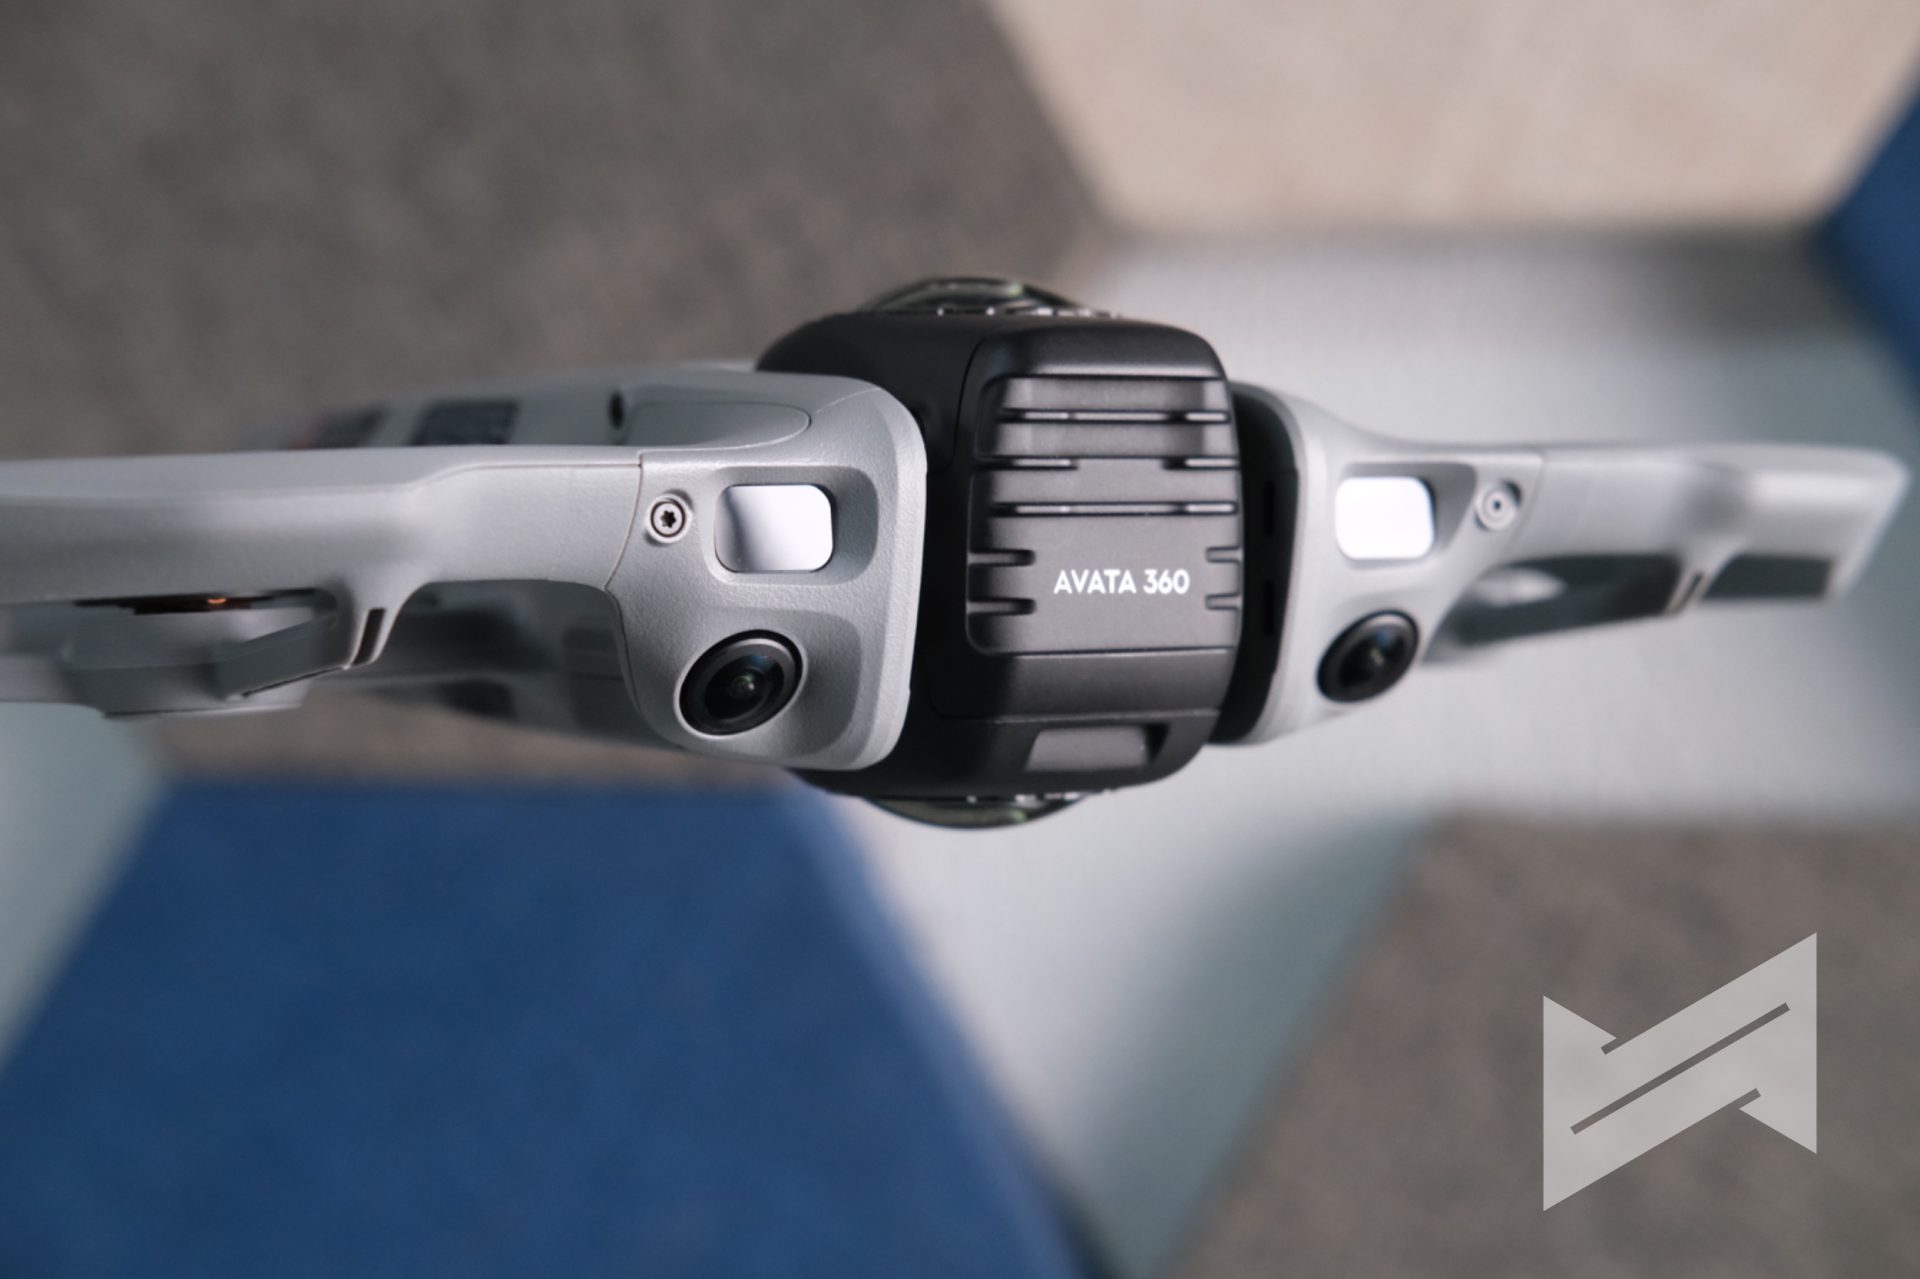
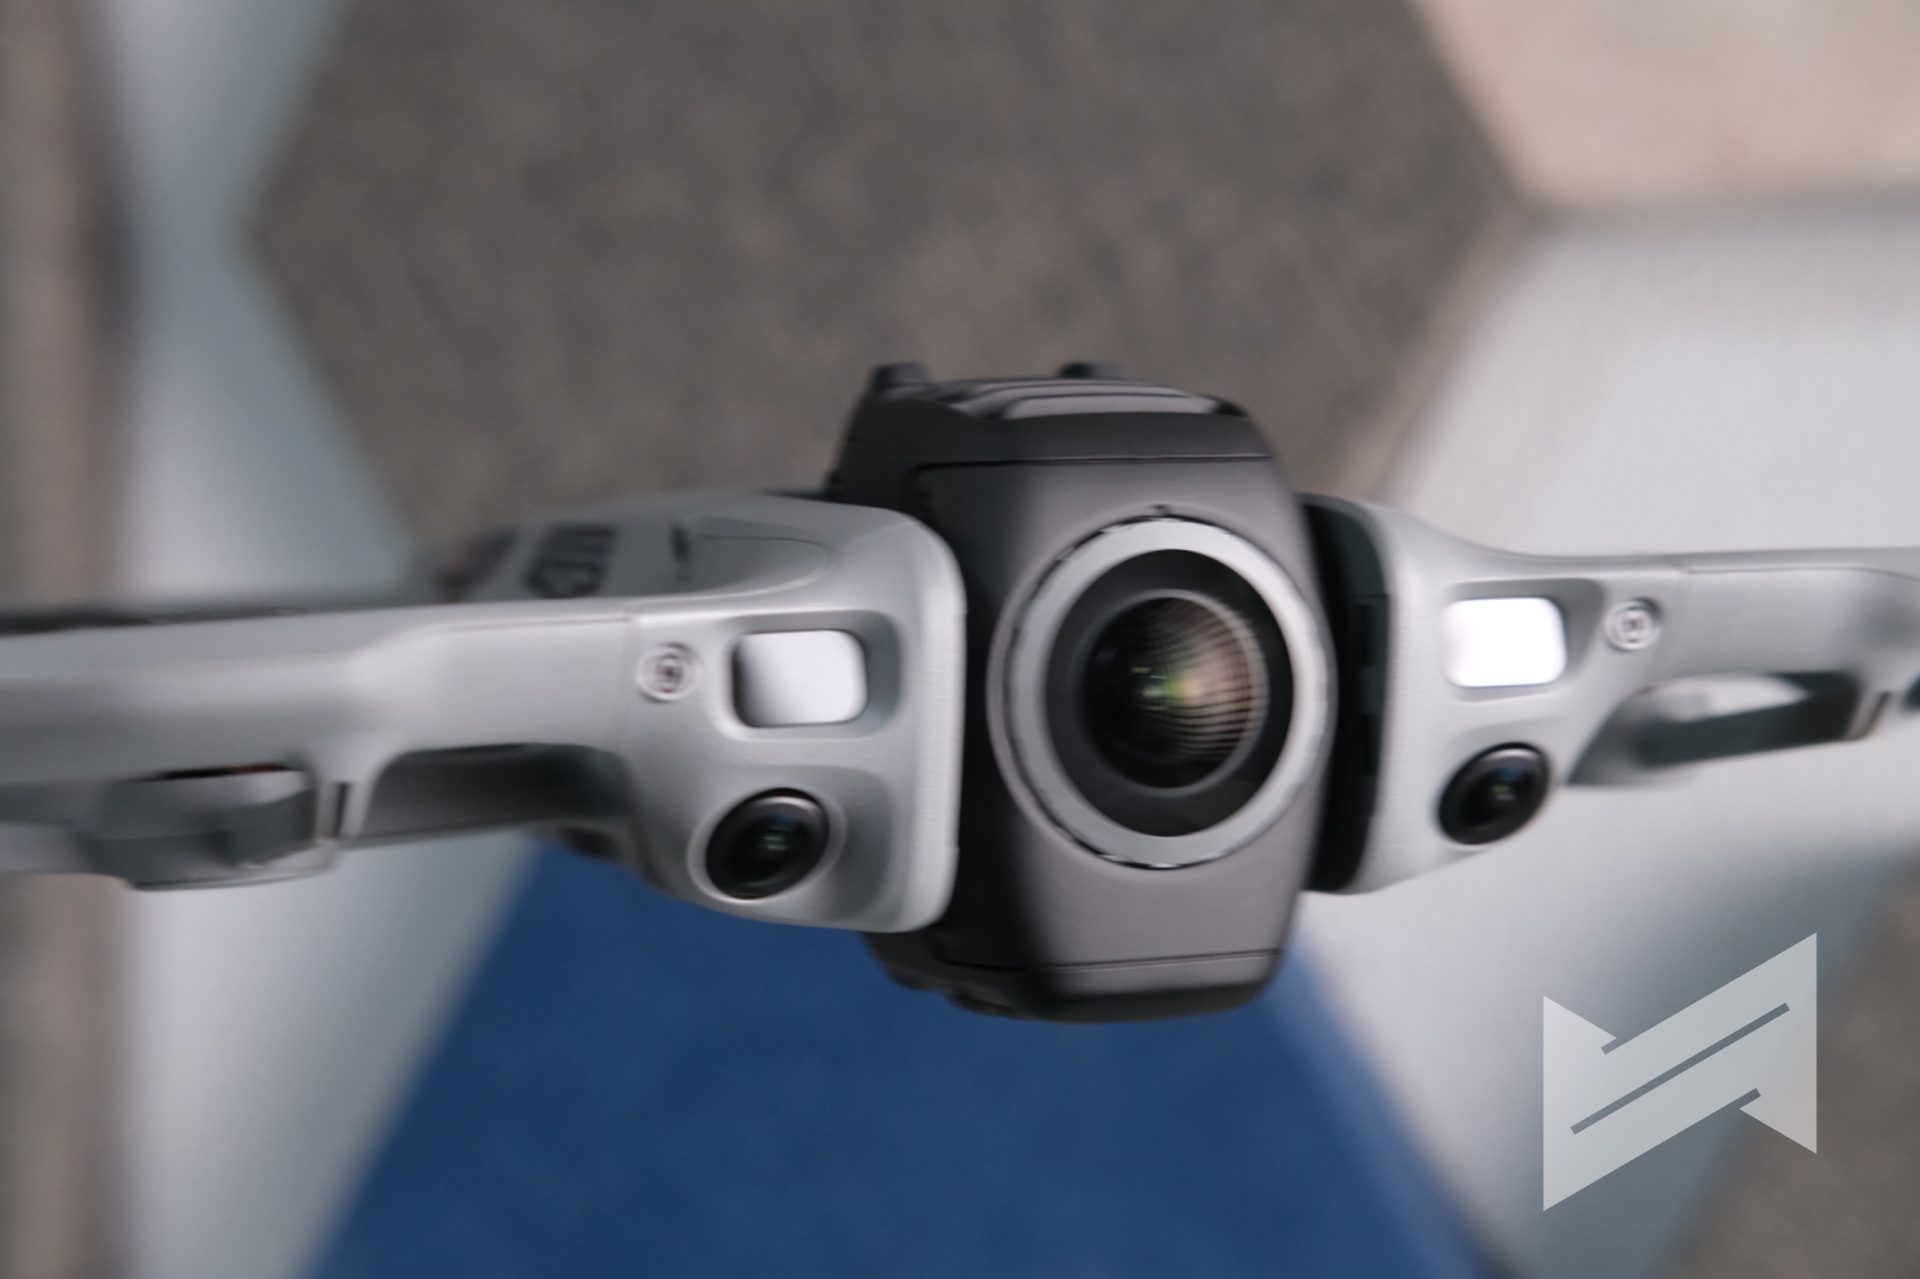
Safety and the Replaceable Front Lens Element
The safety story on the Avata 360 goes beyond sensors and prop guards. The design also accounts for the reality that large 360° lenses are exposed and very easy to scratch or damage during hard landings.

DJI’s answer is a replaceable front lens element. Instead of sending the drone back to a service center, you can buy an official replacement lens kit that includes the tools you need, then swap the damaged front element yourself. For a 360° FPV product, this is a very clever design choice. It reduces downtime and makes the drone friendlier to owners who plan to fly aggressively or near obstacles. It also makes me curious about whether DJI will bring the same idea to future versions of the DJI Osmo 360, because the use case is very similar.
Where the Avata 360 Sits Beside Avata 2 and Neo 2
From my experience, the Avata 360 is not meant to replace the Avata 2. It is also not a direct replacement for the DJI Neo 2. Each of these drones plays a different role in DJI’s ecosystem.
If you already have a Neo 2, it is a great platform to learn FPV-style flying, especially when paired with Goggles N3 or Goggles 3 and the FPV Motion Controller. Once you build confidence there, upgrading to the Avata 2 gives you a more tuned FPV machine that excels at classic first-person flying. The Avata 360, on the other hand, is best seen as a creative extension. It adds 8K 360° imaging, dual lens modes, and a reframing-centric workflow that neither Neo 2 nor Avata 2 can match.
In other words, DJI is not trying to collapse all roles into one product. They are stacking tools that answer different needs. The Avata 360 is that tool you pick when you want one flight to give you several different videos and perspectives.
Pricing
The DJI Avata 360 is sold in three main configurations.
- DJI Avata 360 (DJI RC 2): PHP 38,290
- DJI Avata 360 Fly More Combo (DJI RC 2): PHP 47,890
- DJI Avata 360 Motion Fly More Combo (Goggles N3): PHP 47,890
*Motion FPV Controller is sold separately
Considering the hardware, safety features, transmission system, and the included 360° creative workflow, the price feels reasonable. It is not aimed solely at professionals. It is also positioned as a solution for content creators who want more creative freedom in how they frame and present their drone footage.
Verdict
The DJI Avata 360 is one of the most interesting drones in DJI’s current lineup. It focuses on trying a new way to think about drone footage.
For non-professional pilots like me, it offers a balance of safety, creativity, and accessibility. The omnidirectional obstacle avoidance and forward LiDAR help reduce the fear factor, especially in tight or low-light environments. The dual-mode design that switches between 360° and single lens gives you flexibility that regular drones and traditional 360° cameras do not combine in one product. The reframing workflow with DJI Fly and DJI Studio means one flight can power a full batch of content.
The 360° drone category is still niche, but it is clearly growing because it offers a very flexible output and workflow. Among the current options, the Avata 360 stands out as the most complete and well thought-out choice. It may not be as visually flashy as the Antigravity A1, but it delivers the solutions that real users ask for and that is what matters.
If you are a content creator who wants to push your aerial visuals further, or an FPV-curious pilot who loves the idea of reframing after the fact, the DJI Avata 360 deserves a serious look.

Giancarlo Viterbo is a Filipino Technology Journalist, blogger and Editor of gadgetpilipinas.net, He is also a Geek, Dad and a Husband. He knows a lot about washing the dishes, doing some errands and following instructions from his boss on his day job. Follow him on twitter: @gianviterbo and @gadgetpilipinas.