So, you finally got your ASUS ROG Ally. Congratulations! We prepared this article to help you kickstart your Ally experience, and optimize it to fit your lifestyle. I have the Ally for more than a month now, and I have used done quite a number of “experiments” with the device, the same thing with what I’ve done on the Steam Deck.
The Unboxing Experience
The box also includes the ASUS ROG Ally with Z1 Extreme – at least for the variant we received, a couple of documentations, and a 65W charger, which is surprisingly larger than expected. Don’t also forget that the box also comes with an ROG Ally stand that’s kept inside the box/lid. You can use that as your stand while waiting for supported dock.
You can watch our full unboxing experience here:
Optional Step: Upgrading your SSD
Important information: While this may work right out of the box, it is highly encouraged to go through the first OOBE process with the original SSD and update the firmware/BIOS before replacing the SSD. I received multiple reports that those who swapped the SSD immediately got stuck on “Checking” after connecting to the Wi-Fi.
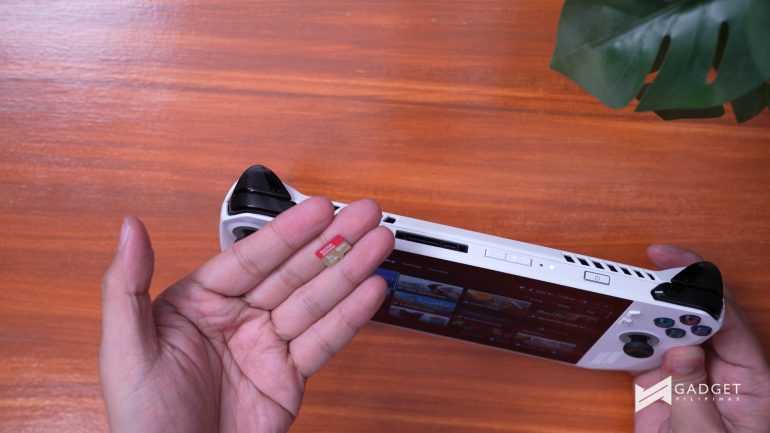
Remove the 6 screws. The screw at the lower middle area is captive, at least on my review unit. It’s smaller, so keep that in mind. Use a pick to pry open the back panel. The process isn’t as difficult as the one on the Steam Deck and you don’t have to also remove the Micro SD card. But, I still suggest that you do so to avoid any issues.
Next, remove the battery cable from the motherboard. It’s located at the middle. Then, open the thermal cover, remove the SSD screw, and replace it with the new one. Return the black flap. Re-connect the two battery pins. Replace the back panel and re-screw everything.
Before you turn on your ROG Ally with the new SSD, get the official charger, connect it to the power outlet, and insert the Type C end to the ROG Ally without pressing anything. It should boot the ROG Ally. Voila. You now have an upgraded storage on the ROG Ally.
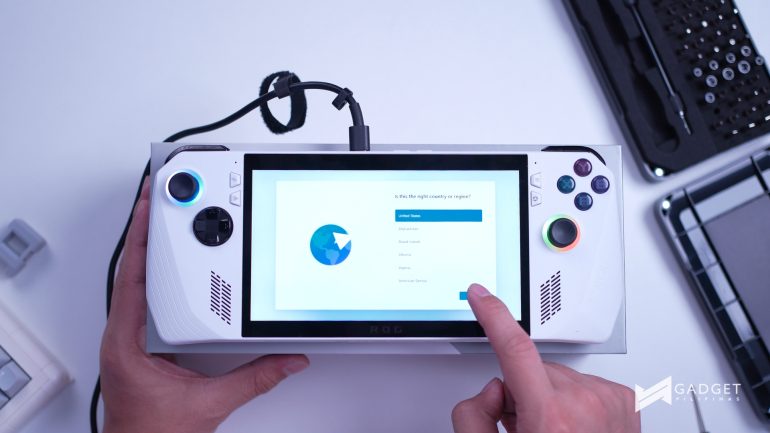
When you boot it up, you’ll automatically be redirected to the BIOS. You can navigate through the menu with touch or the controllers. Go to Advanced, then click ASUS Cloud Recovery. Tap View Policy, agree to the policy, and click agree. Click Next so the Ally will connect to any available Wi-Fi network. Once connected, proceed to Cloud Recovery. Be sure that you have more than enough battery to proceed through this process. It is best to connect this to the outlet throughout the Cloud Recovery process. Once it is done, click Confirm and wait for it to restart. This is the point where other additional software are downloaded to prime the Ally for quick use after the recovery process. This will take some time, so please be patient. Just go through the process, and once you’re asked if you want to backup your files, you can just simply ignore this since the premise of this process is you’re using a brand new SSD.
Once you’ve seen the Windows setup screen, that’s when you can start setting Windows up. At this point, the system has already recovered through the Cloud. You can then just proceed through the setup process, and then start installing the games you want to play.
Steps after the Windows OOBE Experience
Now, that you’ve gone through the Windows OOBE Experience, it is time to get yourself familiar with the companion applications of the ROG Ally, and how you can further optimize it to fit your gaming lifestyle.
As a Windows gaming handheld device, you will pretty much have to deal with Window’s improved, albeit imperfect handheld gaming user-experience. The ROG Ally employs a tablet-optimized Windows software experience at first boot, and I don’t encourage you to stick with it.
Workarounds to “Melting” Micro SD Cards
There’s a widely reported issue about “melting” micro SD cards since the chip dedicated for it is only rated up to 70C. ROG acknowledged this issue that they are now currently investigating. But, this doesn’t mean that there is no solution to this issue right now.
ROG Ally’s Sweet Spot: 18W TDP and Custom Fan Settings
The ROG Ally community is very active in looking for ways to address the issue and these are the ones that I recommend that you do:
Open Armoury Crate, and go to Settings. Then go to Operating Mode, and select Manual. Create a new profile, and follow these fan settings:
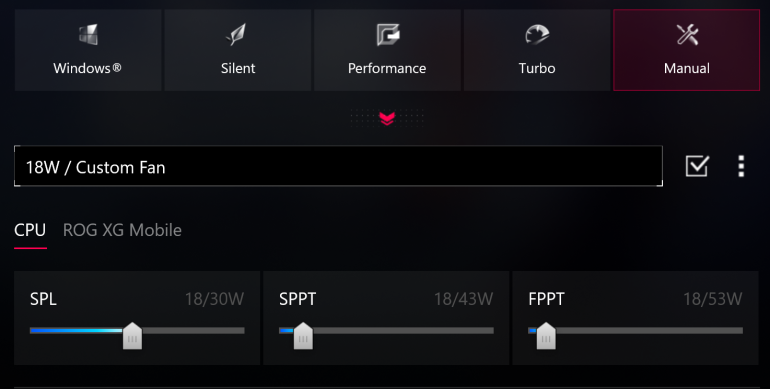
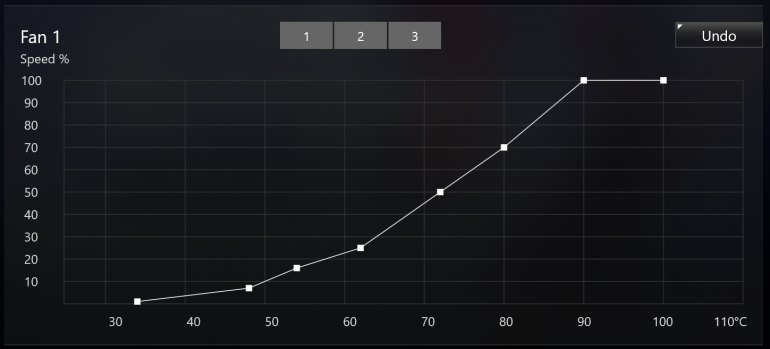
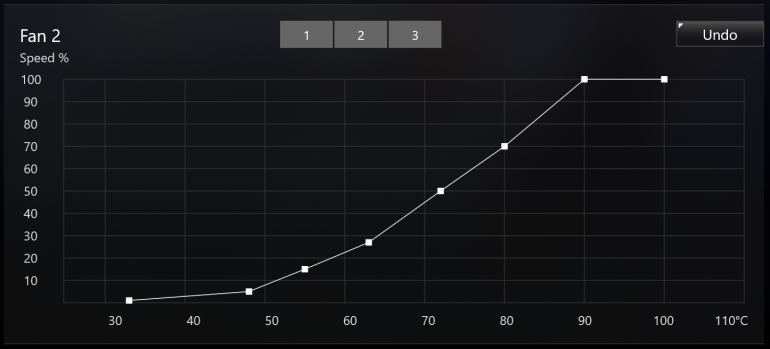
These are just my recommended fan settings at 18W, which I also believe as the sweet spot of the ROG Ally. I can play most of my games at 18W without issues with these settings. The fans can get loud though… but not “Steam Deck” loud, to ensure that it’s getting enough heat management higher CPU utilization kicks in. Now, take note that you have a separate fan profile when the ROG Ally is connected to a charger or XG Mobile, and on battery.
Disable CPU Boost to save on battery
There are games that do not have significant increase in FPS performance with CPU boost enabled. In a video by Filterless, he discovered that CPU Boost is enabled at default on the ROG Ally on all Power Profiles. When you check advanced power settings, you will not find anything that says “Processor Performance Boost Mode” because it is disabled at default. This is where you can disable Boost Mode, which as I have said, is turned on at default. You can just easily disable this by doing the following:
Hit start. Type ‘regedit’, and a window will open. Go to “HKEY_LOCALMACHINE” > SYSTEM > CurrentControlSet > Control > Power > PowerSettings > Find the one that starts with “54533251-”, expand this then go to a folder that starts with “be337238-”.
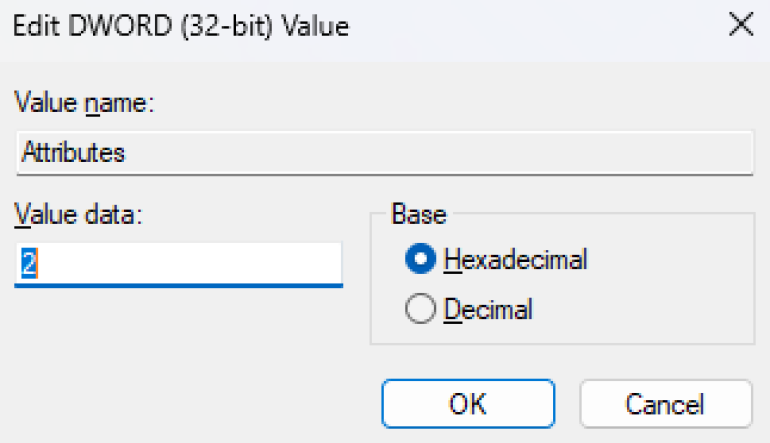
Click the folder, and on the right side and click Attributes. Default is at 1, and to show CPU Boost settings, change it to 2. You’re good to go! Now, all you have to do is go to edit a specific power plan and change the setting from Aggressive to Disabled.

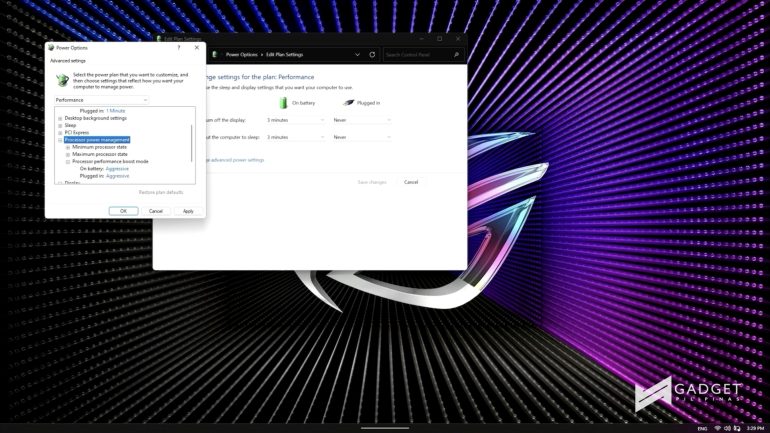
Now, to get to this setting, simply click Start, and then type Edit Power Plan, and click change advanced power settings. You have to take note that each profile has its own power setting on Windows. If you have a custom or manual power mode, you will not find it in the Windows Power Plans. I haven’t found a way to customize the Processor Performance Boost Mode on my custom 18W power plan. Just keep that in mind.
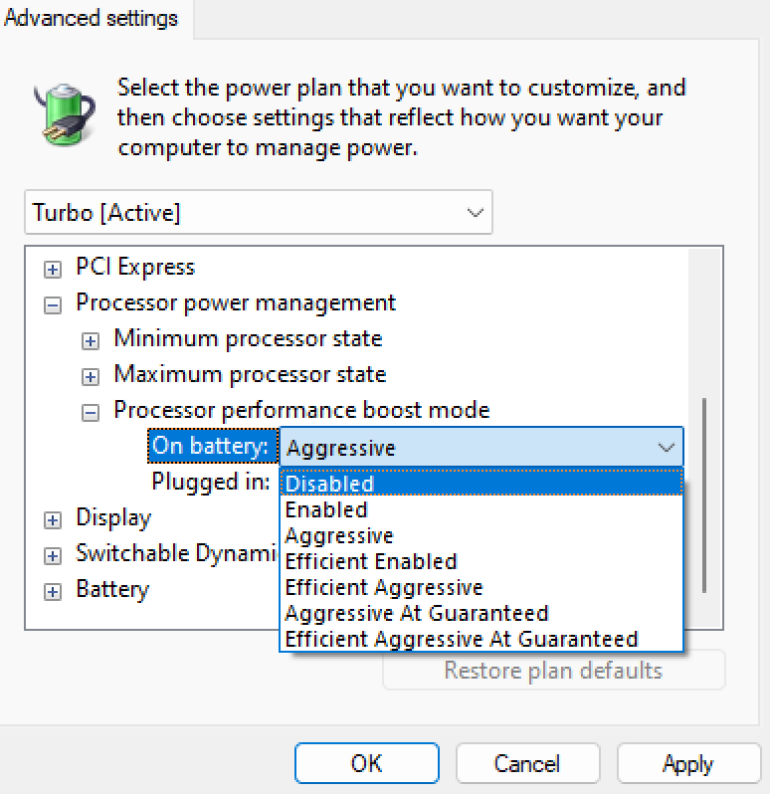
This should allow you to lower the clocks, which may be unnecessary on some triple A titles. Just in case you’ll be playing games that need more CPU power or where CPU boost is a must, then just go ahead and enable it again by switching it back on. This is particularly useful to those who wish to lower the clocks to save on battery, because for some reason, ASUS set the CPU Boost to aggressive.
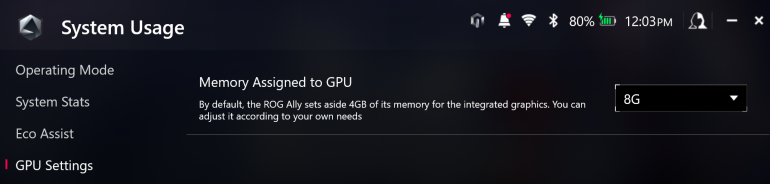
Switch Memory Assigned to GPU to 8G
Next, the ROG Ally has 16GB of RAM. At default, the ROG Ally uses 4GB for the integrated graphics. You can change this to 8GB by going to the Armoury Crate. Within the Armoury Crate, go to Settings. Then click Operating Mode, Scroll Down to Memory Assigned to GPU, and change it to 8G. Be sure to restart your ROG Ally after this process. Remember that each time the BIOS is updated, this will reset to 4G, so be sure to change it back to 8G, if necessary.
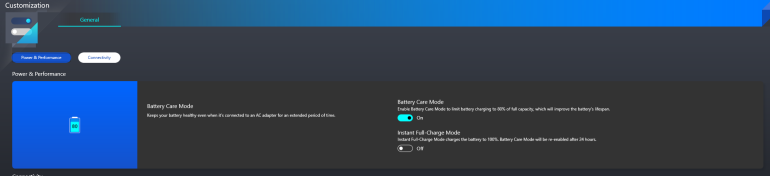
Enable Battery Bypass Mode
The ROG Ally, like most ASUS laptops, has battery bypass mode. This keeps your battery healthy even when it’s connected to the AC adapter for extended period of time. As someone who seldom plays with the Ally on battery, this feature is particularly useful for me! To enable, go to MyAsus app, then click “Customization”, then under Power and Performance, Enable Battery Care Mode.
So far, these are the things that we highly recommend right when you first boot your ASUS ROG Ally. Of course, stay tuned for updates because some may or may not be applicable once ASUS rolls out new software and BIOS update.
The ASUS ROG Ally will officially be available in the Philippines on July 20. Official SRP remains to be unconfirmed by ASUS as of this writing.
We encourage you to check our YouTube and latest/updated articles on our website about ROG Ally and other handheld gaming devices.

Giancarlo Viterbo is a Filipino Technology Journalist, blogger and Editor of gadgetpilipinas.net, He is also a Geek, Dad and a Husband. He knows a lot about washing the dishes, doing some errands and following instructions from his boss on his day job. Follow him on twitter: @gianviterbo and @gadgetpilipinas.