


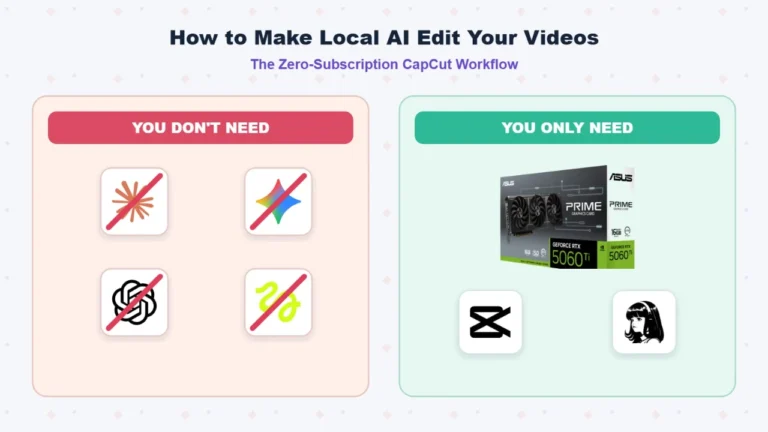
If you have spent any time on social media lately, you have probably seen the viral clips of creators showing AI automatically editing vertical reels from scratch, cutting out silences, snapping in kinetic captions, and flying in motion graphics with a single prompt. It looks enticing at first, but as soon as you get their work flow, you’ll hit a paywall. Most of those trending tutorials rely on a hefty recurring software stack: a Claude Pro subscription ($20/month or more), third-party generative video or audio MCP plugins like Higgsfield AI that has its own subscription, Moreover, theseworkflows export flat, uneditable MP4 files. If a subtitle is misspelled or a cut lands half a second off, you have to burn more tokens and prompt all over again as the AI will rewrite your entire video.
With the rising Peso-Dollar Forex rates, and cloud AI providers cutting usage limits as a form of inflation, the AI editor trend will likely make you run out of tokens before getting a fully polished video. That said, we’ve made this AI Editor workflow possible using local AI, specifically our ASUS Agent Computer featuring an ASUS Prime GeForce RTX 5060 Ti 16GB running a local AI model on Hermes Agent.
Instead of an unchangeable video render, our local AI creates an actual CapCut project draft with native tracks. Our AI takes care of cutting dead air, placing word-pop captions, and animating motion graphic overlays—while leaving the timeline open. You can jump into CapCut for any revision in timing, cuts, or add your own effects.
Here is the complete, beginner-friendly guide to setting up your own local AI video editor.
What You Will Need
1. The Hardware & Local AI Model
Running AI locally requires a computer with a dedicated graphics card so the model can process your requests quickly and handle media files. For this project, we built and used the ASUS Agent Computer:
- GPU: ASUS Prime GeForce RTX™ 5060 Ti 16GB OC
- CPU: Intel® Core™ Ultra 7 270K Plus
- Cooler: ROG Ryujin III 360 ARGB Extreme
- Motherboard: ASUS ROG Strix B860-F Gaming WIFI
- RAM: Corsair Dominator 32GB DDR5
- SSD: AGI AI828 1TB SSD
- PSU: ASUS TUF Gaming 850W GOLD
- Case: ASUS Prime AP31
Note: You do not need this exact system to follow along. Any modern desktop PC with a capable NVIDIA GPU (we recommend 12GB to 16GB of VRAM or higher) will work.
Having 16GB of VRAM allowed us to run Qwen 3.6 35B-A3B locally at a 2-bit quantization via GGUF (such as unsloth/Qwen3.6-35B-A3B-GGUF), which fits comfortably inside GPU memory while maintaining a large enough context window for structured editing tasks. You can also use other popular open-source models like Gemma 4, or smaller 14B/8B models depending on what fits your GPU.
2. The Software Toolkit
Everything in this workflow is free and open-source, replacing paid cloud subscriptions with local software:
- Hermes Agent: The open-source AI agent harness from Nous Research. It gives local models the ability to execute terminal commands, run Python scripts, read files, and call modular tools without vendor lock-in.
- CapCut Desktop: The free video editing software where the final draft timeline is assembled and reviewed.
- VectCutAPI: An open-source tool that lets AI agents programmatically build and modify native CapCut draft files (adding video clips, text, audio, and keyframe animations).
- SmartCut / CapCut AI Editor: A smart editing utility that analyzes auto-generated subtitles to automatically detect silences, trim dead air, and cut duplicate takes.
- HyperFrames: A code-to-video motion graphics engine that lets the AI turn web animations (HTML5/Canvas/CSS) into video assets and transparent overlays.
- FFmpeg: The essential open-source multimedia utility for rendering video overlays, extracting audio waveforms, and converting media.
Setting Up Your Project Folders
Before prompting your AI, you need to organize your files. Setting up a tidy folder structure ensures that your local AI knows exactly where your raw footage lives and where to pull reference styles from—no guesswork required.
Create a folder on your computer (for example, inside your Videos or Projects folder) named after your video, with two subfolders inside:
AI Editor/
├── Assets/
│ ├── talking_head.mp4 <– Your main raw camera footage (A-roll)
│ ├── broll_clip1.mp4 <– Extra video clips or product close-ups
│ ├── screen_recording.mp4 <– Any screen captures or still photos
│ ├── background_music.mp3 <– Your background audio track
│ └── script.txt <– Your written script or voiceover notes
└── References/
├── style_reference_01.mp4 <– 1 to 3 viral reels or video clips
└── style_reference_02.mp4 <– whose pacing, text, or cuts you like
Once your files are in place, you are ready to let Hermes Agent do the work.
Step 1: The Master Setup Prompt
You do not need to manually clone repositories or install Python packages one by one. You can provide Hermes Agent with a Master Setup Prompt that instructs it to inspect your hardware, verify your local model, and prepare the necessary tools automatically. Copy and paste this prompt into your Hermes console:
You are acting as my local video production assistant. I am setting up an automated, zero-subscription video editing workflow that uses Hermes Agent, a local AI model, and CapCut Desktop.
I do not want to use any paid cloud AI services, Claude subscriptions, or paid plugins. Everything must run locally on my machine.
Please perform the following initial setup and environment audit:
1. System & GPU Check: Inspect my operating system and verify my NVIDIA GPU. Check that my local AI model runtime is active and has enough VRAM available.
2. Media Tools: Check if FFmpeg is installed and accessible in the system PATH. If missing, install it or provide the exact terminal commands for my OS.
3. Motion Graphics: Check if the HyperFrames environment is ready so we can render programmatic motion graphics and overlay cards locally.
4. CapCut Integration:
– Locate the local CapCut Desktop drafts folder on my machine.
– Review and set up the local VectCutAPI draft-generation tools and SmartCut silence-detection scripts from our workspace.
– Package these tools into a local Hermes skill named “capcut-editing” so you can generate CapCut drafts, place clips, and synchronize captions.
5. Safety Rule: Ensure that you never overwrite raw video footage. Always create a new draft copy of any CapCut project before making changes.
Report back with a clean summary of installed tools and confirm when the environment is ready for our first edit.
Hermes will run the necessary background checks, ensure FFmpeg and the draft-writing tools are active, and confirm when the pipeline is ready.
Step 2: Extracting Style from Your Reference Videos
The biggest mistake people make when using AI for creative work is using vague instructions like “make it look engaging.” AI needs concrete instructions for favorable outputs. Instead of guessing, we use our References/ folder. We point Hermes to a couple of reels whose editing style we admire, and ask the agent to analyze their pacing, caption styles, zoom techniques, and motion graphics into a Style Brief. Paste this prompt into Hermes:
I want you to establish the visual style and motion design for my upcoming CapCut video edit based on the videos in my reference folder.
Reference Folder: [INSERT PATH TO YOUR My_Video_Project/References FOLDER]
Please analyze these reference videos and break down their editing style:
1. Pacing & Cuts: How fast are the cuts? How frequently do zoom-ins happen to emphasize key words?
2. Captions & Typography:
– Where are the captions placed on screen?
– What font style, size, outline, and highlight colors are used?
– Are the captions animated word-by-word or shown in short phrases?
3. Motion Graphics & Visuals:
– How do graphic pop-ups, spec cards, or screenshots animate onto the screen?
– What visual effects or transitions are used between different topics?
4. Audio & Sound Cues:
– How does background music duck under speech?
– What sound effects (whooshes, pops, dings) accompany on-screen graphics?
Combine these observations into a simple “Project Style Brief” for a 9:16 vertical video. Do not edit any files yet—show me the brief first for approval.
Hermes will return a clear description of the editing style—for instance, noting that captions should be centered, uppercase, with yellow highlight keywords and a slight punch-in zoom on every major sentence. Once you review and approve it, Hermes carries that exact look into your video.
Step 3: The Master CapCut Edit Prompt
With your tools verified and your style approved, it is time to build the edit. You simply hand Hermes your project folders and script, and instruct it to build the CapCut draft timeline. Paste this prompt into Hermes (replacing the folder paths with your own):
Please edit my video inside CapCut Desktop using our local AI editing pipeline and our approved Style Brief. Project Details: – Project Name: [YOUR PROJECT NAME, e.g., My First Tech Reel] – Assets Folder: [INSERT PATH TO YOUR My_Video_Project/Assets FOLDER] – Script / Narration: [PASTE YOUR SCRIPT TEXT OR SPECIFY script.txt IN ASSETS] – Target Format: 9:16 Vertical Video (1080×1920) – Highlight Words: [LIST 3-5 KEYWORDS YOU WANT HIGHLIGHTED IN CAPTIONS] Instructions: 1. Ingest Assets: Scan the Assets folder. Identify the main talking-head video, B-roll clips, background music, and script notes. 2. Rough Cut & Silence Removal: Use SmartCut logic to trim out dead air, long pauses (over 0.75s), and retakes from the talking-head video. 3. Framing & Zooms: Add subtle punch-in zooms (1.1x to 1.15x) on key topic shifts to keep the video visually dynamic. 4. Subtitles: Generate synchronized captions in the approved style. Place them in the safe viewing area (well above the bottom edge so platform UI does not block them). Highlight our key terms with our accent color. 5. Motion Graphics & B-Roll: – Render any spec callout cards, animated text banners, or graphic pop-ups using HyperFrames and FFmpeg. – Insert relevant B-roll clips over the talking-head footage where indicated in the script. 6. CapCut Assembly: – Make sure CapCut is closed. – Create a brand new project draft folder inside CapCut’s drafts directory named “[YOUR PROJECT NAME] – AI Edit Draft 01”. – Assemble the timeline with all video tracks, audio tracks, cuts, subtitles, and overlays. When finished, do not export an MP4. Provide a summary of the edits made and confirm the exact path to the new CapCut draft so I can open it.
Hermes will process the clips, trim silences, render any graphic cards, and write the timeline directly into CapCut’s drafts directory.
Step 4: Reviewing Your Video and Iterating with Revisions
Once Hermes reports that the draft has been created, launch CapCut Desktop on your computer. You will see your new project right on the home screen under Local Projects. Click to open it:
+-------------------------------------------------------------------------+
| CapCut Desktop - [My First Tech Reel - AI Edit Draft 01]                |
+-------------------------------------------------------------------------+
| [Preview Window]       |  Track 4: [HyperFrames Graphic Overlays]       |
|                        |  Track 3: [Kinetic Subtitles & Highlight Text] |
| 1080x1920 Canvas       |  Track 2: [B-Roll Video Inserts]               |
| Active Playhead        |  Track 1: [Trimmed Talking Head + Jump Cuts]   |
|                        |  Audio 1: [Clean Speech Track]                 |
|                        |  Audio 2: [Background Music (-18dB Ducking)]   |
+-------------------------------------------------------------------------+
Because the AI created an editable timeline rather than a flattened video, you have complete control over how you refine it.
Method A: Quick Manual Tweaks in CapCut
If an edit is 95% perfect and just needs minor personal adjustments, do it directly in the app:
- Nudge a Cut: Click and drag any cut point on Track 1 if you want a breath to feel slightly longer or tighter.
- Adjust Text: Click any caption box to fix a typo or change a word’s color in CapCut’s native text panel.
- Volume Balancing: Drag the volume line on Audio Track 2 up or down if the background music feels too loud.
Method B: Prompting Hermes for a Revision Pass
If you want larger automated changes across the whole timeline, close CapCut and give Hermes a quick revision prompt:
I reviewed Draft 01 in CapCut and would like to create Draft 02 with the following revisions:
1. Pacing: Tighten the silence threshold—trim pauses down to 0.5 seconds for a faster pace.
2. Captions: Increase the font size by 10% and change the highlight color to bright yellow.
3. Overlays: Move the graphic card that appears at 0:15 so it starts two seconds earlier, right as I say the product name.
4. B-Roll: Extend the B-roll clip on Track 2 so it covers the entire sentence about hardware specs.

Save this as "[YOUR PROJECT NAME] - AI Edit Draft 02" without overwriting Draft 01, and let me know when it is ready to review.
Hermes will generate a new draft version, allowing you to compare iterations without ever losing your previous work. Once you are satisfied with the timeline, click Export inside CapCut to render your finished, high-resolution video.
The Cost Breakdown: Local Hardware vs. Cloud Subscriptions
Building a local AI editing setup requires an upfront investment in hardware, but looking at recurring costs for AI subscriptions show why it makes financial sense over time:
| Cost Category | Cloud AI Pipeline (Claude Pro + Paid MCPs) | Local AI Pipeline (ASUS Agent PC) |
|---|---|---|
| Language Model Access | Claude Pro/ChatGPT/Gemini Php 1,300/mo or 15,600/year | Open-Source Models: Php 0 |
| Generative Tools / Plugins | Higgsfield, Runway, or ElevenLabs Php 600/mo or 7,200/year | HyperFrames + FFmpeg: Php 0 |
| Cloud API Token Overages | Heavy revision & video analysis costs: variable atleast Php 2,000~ | Local Inference: Php 0 (Unlimited runs) |
| Hardware Required | Basic laptop or office PC: Php 0 if you already own | ASUS Agent PC with RTX 5060 Ti 16GB: Php 95,000 RTX 5060 Ti 16GB only: Php 45,000 |
| Year 1 Total Investment | Php 24,800 | Agent PC Cost or GPU Cost |
| Year 2 & Beyond | Php 24,800 | Php 0 (Only home electricity) |
| Creative Workflow | Flat MP4 exports; re-prompting burns tokens | Native CapCut timeline; reusable rendered assets |
| Data Privacy | Raw footage uploaded to cloud servers | 100% on-device; files never leave your drive |
Within the first year alone, recurring cloud subscriptions and API overages can easily match or exceed the cost of an enthusiast graphics card. In Year 2, the local setup is essentially free to run. More importantly, you own a physical PC capable of doing task beyond the AI Editor workflow that you bought it for. The ASUS Agent PC build that we have is far more capable than your average PC meaning that it can handle diverse workloads with ease such as 3D work, professional photo & video editing, local AI inference and even Gaming.
Do More With Your ASUS Agent PC
Automating your video production does not mean handing over your footage or your monthly budget to subscription services. By combining capable desktop hardware like the ASUS Agent Computer and an ASUS Prime GeForce RTX 5060 Ti 16GB with open-source tools like Hermes Agent, Qwen 3.6, HyperFrames, and CapCut Desktop, you can build a fast, private, and zero-subscription editing pipeline right in your workspace.
The main highlight of this project is to showcase that local AI can manage to compete with these frontier cloud models, given the right combination of prompting, and a capable PC or graphics — most of you already own. As for the electricity costs, our local AI setup technically codes the cuts, motion graphics, and animations consume no less than a typical gaming session.

Grant Soriano
Grant is a Financial Management graduate from UST. His passion for gadgets and tech crossed him over in the industry where he could apply his knowledge as an enthusiast and in-depth analytic skills as a Finance Major. His passion allows him to earn at the same time help Gadget Pilipinas' readers in making smart, value-based decisions and purchases with his reviews and guides.
View all articles →